Grilled Citrus-Scented Bananas

It’s almost Labor Day and you need a dessert recipe ASAP. It’s time to prep the grill and make this recipe for Grilled Citrus-Scented Bananas.

This recipe makes use of bananas, a delicious and relatively inexpensive fruit, that also packs a nutritious punch. Once grilled, bananas turn even sweeter, thanks to the caramelization happening from the heat. Sprinkle the bananas with a touch of cinnamon and orange zest and you’ve turned the basic banana into a sophisticated dessert.

Bon Appetit!

Print
clock clock iconcutlery cutlery iconflag flag iconfolder folder iconinstagram instagram iconpinterest pinterest iconfacebook facebook iconprint print iconsquares squares iconheart heart iconheart solid heart solid icon

Grilled Citrus-Scented Bananas


  • Author: Sara Haas with Centered Chef

Description

A simple, grilled dessert that will please any palate!


Ingredients

Scale
  • 4 large bananas, no speckles on skin, washed with skin-on
  • 1 tsp butter, melted
  • 1 tbsp honey
  • 1 tbsp fresh orange juice
  • ground cinnamon, for dusting
  • 1 tbsp orange zest
  • 2 tbsp toasted, sliced almonds

Instructions

  1. Cut the bananas in half length-wise (leaving the skin on), then in half width-wise. You will have 4 quarter-pieces of banana.
  2. Combine the butter, honey and orange juice in a small bowl. Brush mixture onto the exposed banana halves and top with a little dash of ground cinnamon.
  3. Place the bananas on the grill cut-side down and cook for about 2-3 minutes, or until bananas have grill marks. Flip over and cook until the bananas are warmed through. The bananas are done when the skin starts to pull away from the fruit.
  4. Serve in the peel and garnish with orange zest and almonds.

Nutrition

  • Serving Size: 8
  • Calories: 88
  • Sugar: 11
  • Sodium: 1
  • Fat: 2
  • Saturated Fat: 0
  • Unsaturated Fat: 1
  • Trans Fat: 0
  • Carbohydrates: 19
  • Protein: 1
  • Cholesterol: 1

Make It Monday Series: Balsamic Reduction

It’s Monday!  That means it’s time for a new recipe, one designed to be used for the whole week.  Last week I started the Series off with Roasted Garlic.  I hope that you were able to enjoy those yummy sweet cloves in all of your dishes.  

This week I would like to introduce you to balsamic reduction.  You’ve used balsamic vinegar countless times, but did you know that when you cook it down it becomes a rich, thick syrup?  It’s a delicious, low-calorie treat with endless possibilities.  I like to use mine as a dressing for mixed greens or drizzled over a bowl of hearty grains. It’s also fantastic spooned over frozen yogurt or sliced strawberries.  

The recipe is simple and you can keep it in the fridge to use all week.  Just be sure to cover with a tight-fitting lid and keep below 40’F.

Use this link to get the recipe. 

The Cutting Board Blog

The Cutting Board header image


It is with great honor and excitement that I can finally announce the launch of The Cutting Board Blog. The blog is an amazing way to learn more about food safety (we make it fun and hey, it’s important to know this stuff!) and easy and delicious ways to prepare your favorite foods (pizza, pasta, all of your favorites!). Expect plenty of recipes, pictures, tips and fun.  

Come on over to the blog where I will be sharing some of my favorite recipes along with other awesome dietitians. So go ahead and bookmark this page, you’ll be glad you did!

Oh, and a special “thank you” to the amazing women who work on the blog behind the scenes! Kudos to you Allison MacMunn and Amanda Cohen. Beautiful work!

Make it Monday Series

Today is the launch of my “Make it Monday” series. This will be a regular post on my blog that features a new recipe (almost) every Monday that you can make early in the week and continue to enjoy the rest of the week. Sound good to you? Ok, then let’s get started with the first recipe.

This week’s feature is roasted garlic. I love this stuff. I love it so much, that I try to always have it on hand in my refrigerator. While I certainly enjoy garlic raw or sauteed, when it’s roasted with a little olive oil, it is simply magnificent. Not a fan of garlic? I bet I’ll convert you with this recipe. Raw garlic can be bitter and rather pungent, but roasting caramelizes the garlic, making it sweet, and providing a softer garlic flavor. You can use roasted garlic in so many ways. You can spread it on toasts to make delicious, guilt-free garlic bread or add it to Greek mayo for a sandwich spread. You can toss it into your next batch of hummus or stir into almost any pasta dish.

Why should you include garlic in your next recipe? Besides adding so much flavor, garlic may also protect your heart by helping lower LDL cholesterol, triglycerides and blood pressure. Garlic also contains antioxidants that have anti-inflammatory and immunity-boosting properties.

So hit the grocery store on your way home and then get roasting!

Print
clock clock iconcutlery cutlery iconflag flag iconfolder folder iconinstagram instagram iconpinterest pinterest iconfacebook facebook iconprint print iconsquares squares iconheart heart iconheart solid heart solid icon

Simple Roasted Garlic


  • Author: Sara Haas

Description

A sweet, spreadable way to enjoy garlic.


Ingredients

Scale
  • 1 head of garlic, loose papery layers removed
  • 1 teaspoon olive oil

Instructions

  1. Preheat the oven to 425’F.
  2. Slice off the top of the head of garlic to expose the cloves.
  3. Place the garlic with the cut end up on a piece of foil then drizzle with oil. Fold up the sides of the foil and loosely close at the top. Place on a sheet pan or directly on the rack in the oven.
  4. Roast until tender, about 25-30 minutes.

Notes

  • Yields about 8-10 roasted cloves

Nutrition

  • Calories: 44
  • Sugar: 0
  • Sodium: 1
  • Fat: 5
  • Saturated Fat: 1
  • Unsaturated Fat: 4
  • Trans Fat: 0
  • Carbohydrates: 1
  • Protein: 0
  • Cholesterol: 0

Grilled Crouton Ensalada

Grilling isn’t just for hamburgers anymore! Celebrate the summer by preparing your next salad on the grill. It’s easy, flavorful and fun to make.

Print
clock clock iconcutlery cutlery iconflag flag iconfolder folder iconinstagram instagram iconpinterest pinterest iconfacebook facebook iconprint print iconsquares squares iconheart heart iconheart solid heart solid icon

Grilled Crouton Ensalada


  • Author: Sara Haas with Centered Chef

Description

A grilled salad recipe that easily serves a crowd.


Ingredients

Scale

For the dressing

  • 1/4 cup freshly-squeezed lemon juice
  • pinch of salt and freshly cracked black pepper
  • 1/4 cup olive oil
  • 1/4 cup parsley, chopped
  • 1 clove minced garlic
  • 1/4 cup grated Manchego cheese

For the grilled vegetables and croutons

  • 1 large whole wheat baguette, sliced in half length-wise
  • 1 medium red onion, cut into 1/4 “ slices
  • 2 large assorted bell peppers, seeded, cut into large planks
  • 1/4 cup olive oil
  • salt and pepper to taste

For the salad

  • 5 roma tomatoes, cored and diced
  • 3/4 cup Spanish olives, chopped

Instructions

  1. To prepare the dressing: whisk together the lemon juice, salt, and pepper in a small bowl. Whisk in the olive oil in a slow stream. Add the chopped parsley, garlic and Manchego.
  2. Pre-heat the grill to medium. Lightly brush the bread halves, red onion slices and bell peppers with olive oil. Season with salt and pepper.
  3. Once the grill is hot, add the vegetables and grill until tender, about 4-5 minutes per side. Remove from the grill and set aside until cool enough to handle. Chop the vegetables into bite-sized pieces.
  4. Place the bread on the grill cut side down and cook until light brown in color and slightly crunchy, about 4-5 minutes. Turn occasionally to prevent burning. Remove from the grill and set aside until cool enough to handle. Chop the bread into large bite-sized pieces. Place the chopped bread, onions and peppers into a large bowl.
  5. Toss the bread and vegetables with the dressing, tomatoes and olives. Let stand at least 10-15 minutes before serving.

Notes

  • Add a can of rinsed and drained garbanzo beans or cannellini beans to make this salad a complete meal!
  • Raining or snowing? No problem, just make the recipe inside using a grill pan. Instead of cutting the bread lengthwise, cut horizontally into 12 pieces, slicing on the bias, brush with olive oil, then grill.

Nutrition

  • Serving Size: 12
  • Calories: 377
  • Sugar: 5
  • Sodium: 453
  • Fat: 16
  • Saturated Fat: 3
  • Unsaturated Fat: 12
  • Trans Fat: 0
  • Carbohydrates: 53
  • Protein: 9
  • Cholesterol: 2

Singing the Praises of Sofrito

Cooking is all about building flavor. And when you’re cooking healthfully, putting that into practice is even more important. Because by layering flavor, you can turn a boring dish into an amazing one. One simple way to do that is to start your dish with a blend of herbs, spices and peppers known as a sofrito. Sofritos are commonly used in Latin American cooking, and vary greatly depending on culture. That’s why there are so many unique variations for one seemingly simple recipe. The version I have created here is based loosely on the Puerto Rican interpretation. Puerto Rican sofritos don’t typically call for tomatoes, so you’ll notice there aren’t any in my recipe. I also roasted my vegetables first, which adds a level of sweetness to the sofrito. Cubanelles are one of the main ingredients, but if you can’t find them at your grocery, you can substitute another sweet bell pepper.

What do you do with the sofrito once you make it? There are several fun ways to incorporate sofrito into the dishes you are already making. If rice is on the menu, saute up the sofrito in a little olive oil first, then add the rice and water, cover and cook until done. Or if you are making a soup, sweat some onion, celery and carrot in a pot in a little olive oil, add the sofrito and cook until fragrant, then add your broth and remaining ingredients. What else can you do? Stir sofrito into sauteed vegetable dishes, beans or stews. Or use it as a spread for sandwiches or tortas. The options are truly endless. So enjoy this amazingly healthy recipe to add bold flavors to your next meal.

Print
clock clock iconcutlery cutlery iconflag flag iconfolder folder iconinstagram instagram iconpinterest pinterest iconfacebook facebook iconprint print iconsquares squares iconheart heart iconheart solid heart solid icon

Sara’s Sofrito


  • Author: Sara Haas

Description

A simply healthy and delicious recipe that can add flavor to anything from rice dishes to beans.


Ingredients

Scale
  • 1 red bell pepper, seeded, stemmed and cut into 2-inch planks
  • 3 cubanelle peppers, seeded, stemmed and cut into 2-inch planks
  • 1 yellow onion, peeled and quartered
  • 1 tablespoon olive oil
  • 1 head garlic, loose, papery leaves removed
  • 1 cup cilantro, washed

Instructions

  1. Preheat the oven to 425’F. Line a baking sheet with foil and lightly coat with cooking spray.
  2. Toss the red bell pepper, cubanelle peppers and onion with half of the olive oil in a large bowl. Spread out in an even layer onto the baking sheet.
  3. Slice off the top of the head of garlic to expose the cloves. Place the garlic with the cut end up on a piece of foil then drizzle with the remaining oil. Fold up the sides of the foil and loosely close at the top. Place on the sheet pan or directly on the rack in the oven.
  4. Roast vegetables for 30minutes or until tender, stirring the pepper and onion mixture halfway through cooking time.
  5. Allow the vegetables to cool slightly. Transfer the peppers and onions to a blender. Squeeze the roasted garlic into the blender and add the cilantro. Blend for about 1 minute, processing until slightly smooth, preserving some of the texture.
  6. Use immediately or freeze for later use

Notes

  • Makes approximately 1 cup sofrito.

Nutrition

  • Calories: 319
  • Sugar: 25
  • Sodium: 32
  • Fat: 15
  • Saturated Fat: 2
  • Unsaturated Fat: 12
  • Trans Fat: 0
  • Carbohydrates: 41
  • Protein: 6
  • Cholesterol: 0

Top Your Next Salad with This!

If you head down the condiment aisle in the grocery store you’ll notice that the salad dressing industry is booming.  It used to be that there were just a handful of varieties and more often than not, you were reaching for the Ranch or Italian version from the brand of your choice.  Now it can take 5 minutes to just narrow down the choices.  While I appreciate the convenience of pre-made salad dressing, I still choose to make my own.  Why?  Well, because like most of the other food I make, I know what’s going in it.  It’s also almost always cheaper and it doesn’t even take that long to make.  One of my favorites it’s a creamy, spicy chipotle dressing.  Not only is it great on salad, but it’s also delicious tossed with cold pasta and veggies for a Southwest pasta salad.  You can also use it as a spread for sandwiches or wraps.  It can be a fun swap for sour cream in tacos or other Mexican dishes.  It’s worth a shot and who knows, maybe you’ll find yourself skipping that condiment aisle at your next trip to the grocery!

Print

clock clock iconcutlery cutlery iconflag flag iconfolder folder iconinstagram instagram iconpinterest pinterest iconfacebook facebook iconprint print iconsquares squares iconheart heart iconheart solid heart solid icon

Creamy Chipotle Salad Dressing


  • Author: Sara Haas

Description

A zesty dressing that can be used for more than just salad!


Ingredients

Scale
  • 3 tablespoons low-fat Greek yogurt
  • 2 tablespoons olive oil-based mayonnaise
  • 1 tablespoon chopped chipotle pepper in adobo
  • 1/2 lime, juiced
  • 1 tablespoon water
  • 1 teaspoon cumin

Instructions

  1. Combine all of the ingredients in a mixing bowl and whisk well to combine.
  2. Cover and refrigerate until use.

Nutrition

  • Serving Size: 6
  • Calories: 38
  • Sugar: 1
  • Sodium: 35
  • Fat: 4
  • Saturated Fat: 1
  • Unsaturated Fat: 3
  • Trans Fat: 0
  • Carbohydrates: 1
  • Protein: 0
  • Cholesterol: 2


Cooked to Perfection, En Papillote

Looking for a new way to cook fish?  What if I told you it was easy and almost fool-proof?  You wouldn’t believe me, right?  But, it’s true.  The trick is to cook fish “en papillote” or in little parchment packets. This method cooks the fish using steam (produced by whatever liquid you introduce into the packet) which keeps fish moist and perfectly flaky.  Another bonus to this type of cooking?  You can infuse so much flavor!  This means you can take almost any mild fish, add herbs, wine, vinegar, and other aromatics and turn it into a delicious masterpiece!  Check out the recipe below I created for Food and Nutrition magazine.  And if you want to learn more about parchment, read more about it here!

Print

clock clock iconcutlery cutlery iconflag flag iconfolder folder iconinstagram instagram iconpinterest pinterest iconfacebook facebook iconprint print iconsquares squares iconheart heart iconheart solid heart solid icon

Barramundi En Papillote with Almond Gremolata


  • Author: Sara Haas RDN, LDN

Description

Perfectly steamed barramundi fillets topped with lemon juice and freshly chopped herbs and almonds


Ingredients

Scale
  • ¼ cup chopped sliced toasted almonds
  • ¼ cup finely chopped parsley
  • 3 tablespoons lemon zest (about 2 small lemons)
  • 2 garlic cloves, minced
  • 1 cup thinly sliced yellow onion
  • 1 cup thinly sliced red bell pepper
  • 1 cup thinly sliced green bell pepper
  • 6 sprigs, parsley, cleaned
  • 6 barramundi fillets, 5 oz each, skinned and boned
  • Kosher salt to taste
  • Black pepper to taste
  • ¾ cup dry white wine

Instructions

  1. Preheat the oven to 400’F.
  2. Cut parchment paper into sheets, approximately 12×16-inches, then fold each piece in half lengthwise. Trace a half of a heart onto each piece, using the fold as the center of the heart. Cut along the traced edges. (You did it correctly if you open the folded paper and see a full heart)
  3. To make the Gremolata: Combine the almonds, chopped parsley, lemon zest and garlic. Stir until well incorporated.
  4. Toss the onion and peppers together in a bowl. On one half of each parchment heart place approximately a ½ cup of the vegetable mixture and a sprig of parsley. Top with a piece of fish and season with salt and pepper. Sprinkle the fish with the gremolata, evenly distributing among the packets. To seal the packets, begin by folding over the heart. Starting with the pointed end, begin making small folds up the open sides of the parchment. Before fully sealing, fill each packet with 2 tablespoons of white wine. Fold closed.
  5. Place packets on a sheet pan and bake for 10-15 minutes or until fish reaches an internal temperature of 145’F for 15 seconds.
  6. The dish can then be served either within the packets or portioned onto plates. If desired, serve with lemon slices or a splash of lemon juice prior to serving.

Nutrition

  • Serving Size: 6
  • Calories: 352
  • Sugar: 4
  • Sodium: 133
  • Fat: 15
  • Saturated Fat: 2
  • Unsaturated Fat: 11
  • Trans Fat: 0
  • Carbohydrates: 8
  • Protein: 40
  • Cholesterol: 119


It’s All about the Kids! Celebrate the First Ever Kids Eat Right Month!

August is Kids Eat Right Month


“To highlight the role everyone plays in ensuring a healthy future for our nation’s children, the Academy of Nutrition and Dietetics and its Foundation announce the first Kids Eat Right Month, to be celebrated each August. Kids Eat Right Month will focus on the importance of healthful eating and active lifestyles for children and families, featuring expert advice from registered dietitian nutritionists.”  https://www.kidseatright.org/

I love kids.  They are fun, hilarious, honest and care-free.  Basically, they are everything that I strive to be!  Kids find joy in so many things and it is a wonder to watch them learn and explore.  That’s why I am very excited that August is now officially Kids Eat Right Month!

This means that we as parents, friends, family members, caregivers, health-care workers and dietitians, have a special month dedicated to teaching the most spectacular people in our world the benefits of healthy eating.  We can take this month to honor our children’s desire to learn and explore by teaching them how amazing food really is.  We can get them into the garden or take them to the grocery store.  We can pull up a stool and have them help us in the kitchen.  Do whatever you can to expose them to the benefits enjoying healthy, wholesome food.

I encourage you to take this month to reach out to your children or the children in your community and teach them the life skills of healthy eating and living.  Teach them and be a role model for them.  If you need clues on how to bring these ideas to life, the Kids Eat Right website is full of helpful information.  Click on this link and get out there and celebrate Kids Eat Right Month!

An Easy Swap

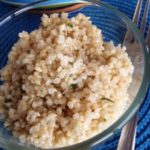
Tired of rice?  Why not try quinoa?  This seed is a true gem in the nutritional department and makes a great replacement for most recipes that call for rice.  What makes it so amazing?  Besides being one of the few plant sources that is considered a complete protein (a real plus for Vegetarians!), it’s loaded with fiber, iron and magnesium.  Another reason to love it?  It’s easy to prepare and only takes about 15-20 minutes to cook. Need some recipe inspiration?  The recipe below is simple and versatile.  It’s delicious as a side dish for any Mexican meal or can be used as a filler for tacos or burritos or even as a topping for a taco salad. Looking to get more mileage out of this recipe?  Amp up the flavor by adding more cilantro along with some chopped green onions.  Want a spicier version?  Try dicing up a jalapeno and cook it along with the cumin.  Need a more satisfying dish?  Stir in black beans, grape tomatoes and corn to make a hearty salad…really the options are endless!  

Print

clock clock iconcutlery cutlery iconflag flag iconfolder folder iconinstagram instagram iconpinterest pinterest iconfacebook facebook iconprint print iconsquares squares iconheart heart iconheart solid heart solid icon

Quinoa with Cumin and Lime


  • Author: Sara Haas

Ingredients

Scale
  • 1 tablespoon olive oil
  • 1 cup quinoa, rinsed thoroughly
  • 1 tablespoon ground cumin
  • 2 cups water
  • 1 lime, juice and zest
  • ¼ cup chopped fresh cilantro
  • Salt and freshly ground black pepper, to taste

Instructions

  1. Set a medium saucepan over medium-high heat and add the olive oil. Once the oil is hot, add the quinoa and toast for 1-2 minutes, stirring constantly. Add cumin and continue to stir, cooking an additional minute. Add the water and bring to a boil. Reduce the heat and simmer, stirring occasionally, until quinoa is cooked, about 15-20 minutes.
  2. Drain any excess water. Add the lime juice and zest, cilantro, salt and pepper and toss until well combined.

Nutrition

  • Serving Size: 8
  • Calories: 96
  • Sugar: 0
  • Sodium: 23
  • Fat: 3
  • Saturated Fat: 0
  • Unsaturated Fat: 2
  • Trans Fat: 0
  • Carbohydrates: 15
  • Protein: 3
  • Cholesterol: 0


Meal Plan like a Pro! Grab my NEW Meal Planning Workbook!

X