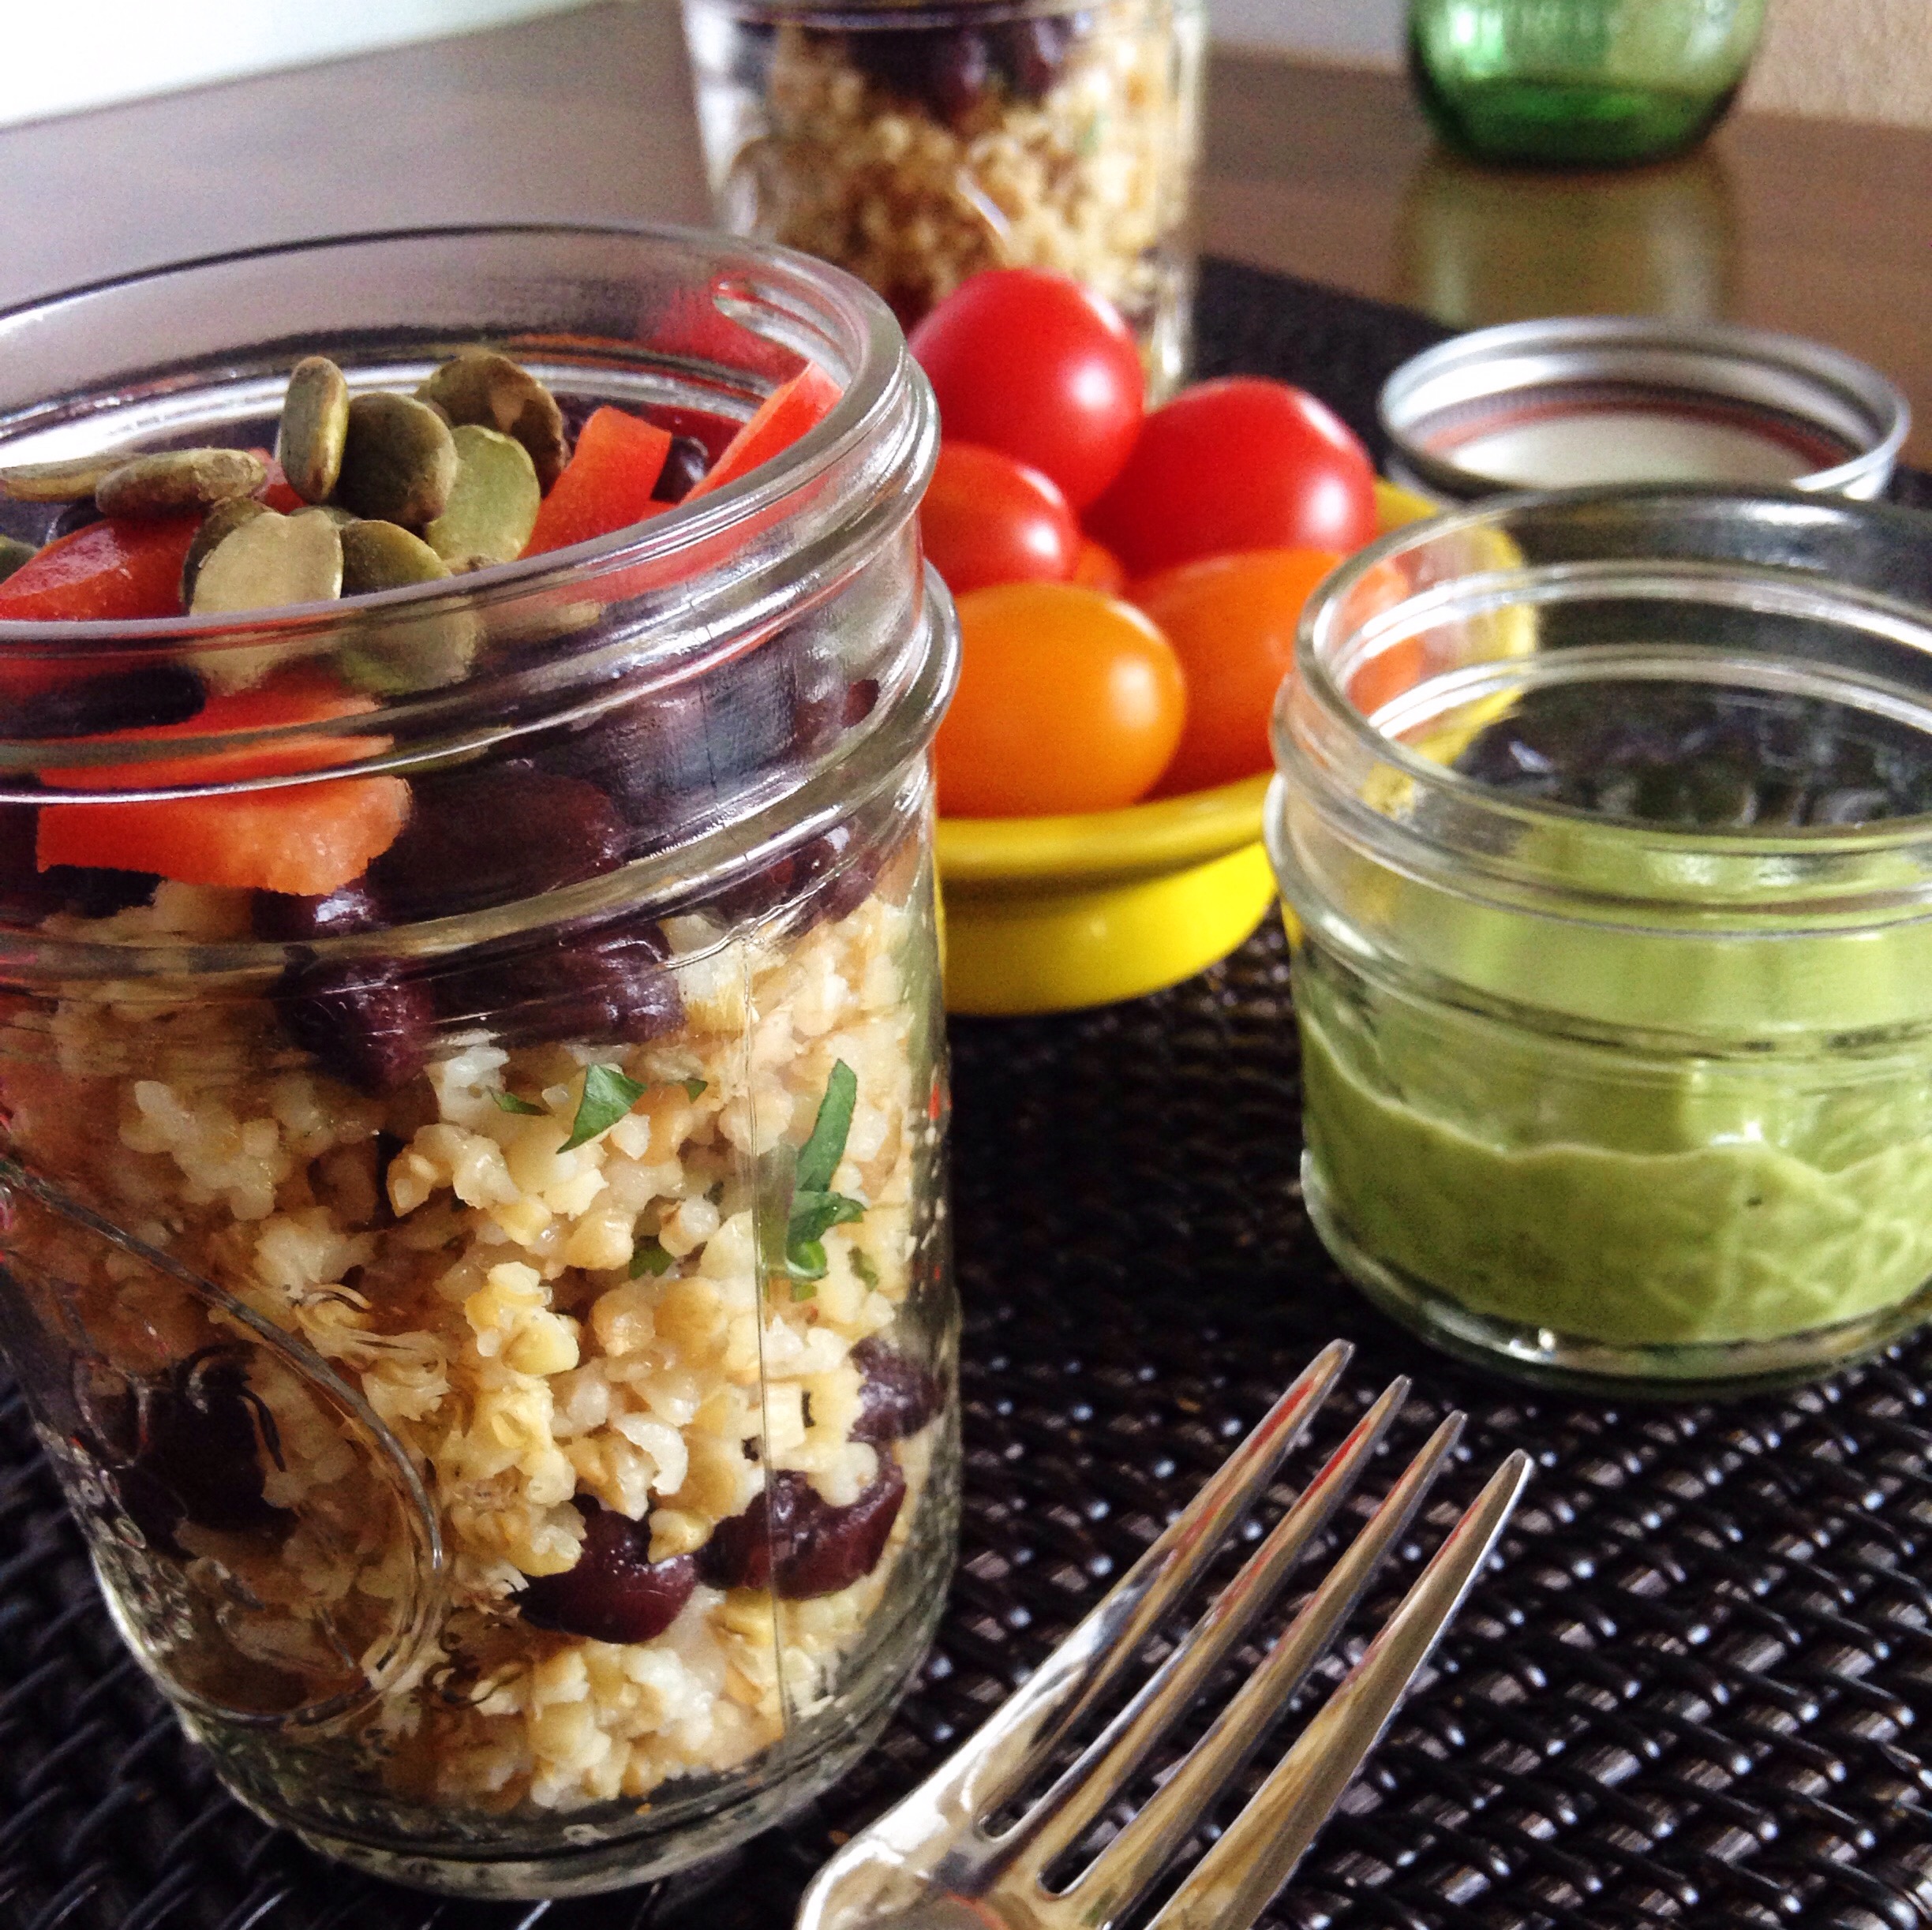
In the quest to be the best dietitian I can be, I have been working diligently to incorporate more, “new” whole grains into my (and my family, friends’ and clients’) recipes. I have to admit, for a while I was stuck on quinoa. It’s simple and versatile…it was a love affair for sure. That love affair continues, but I am opening my mind to new, wonderful grains like freekeh. It’s just as easy to cook and just as easy to love. In fact, it’s a lovely platform for this freekeh with black beans and avocado dressing recipe.
Pizza and pasta are staples in my house. You can safely assume then, that I’ve purchased more than my fair share of jarred marinara sauce. Blown away by the cost of a jar of organic pasta sauce, I decided there was no reason I couldn’t make my own. So after some trial and error, I was finally able to come up with one that I really liked and it’s been a staple in my kitchen ever since.
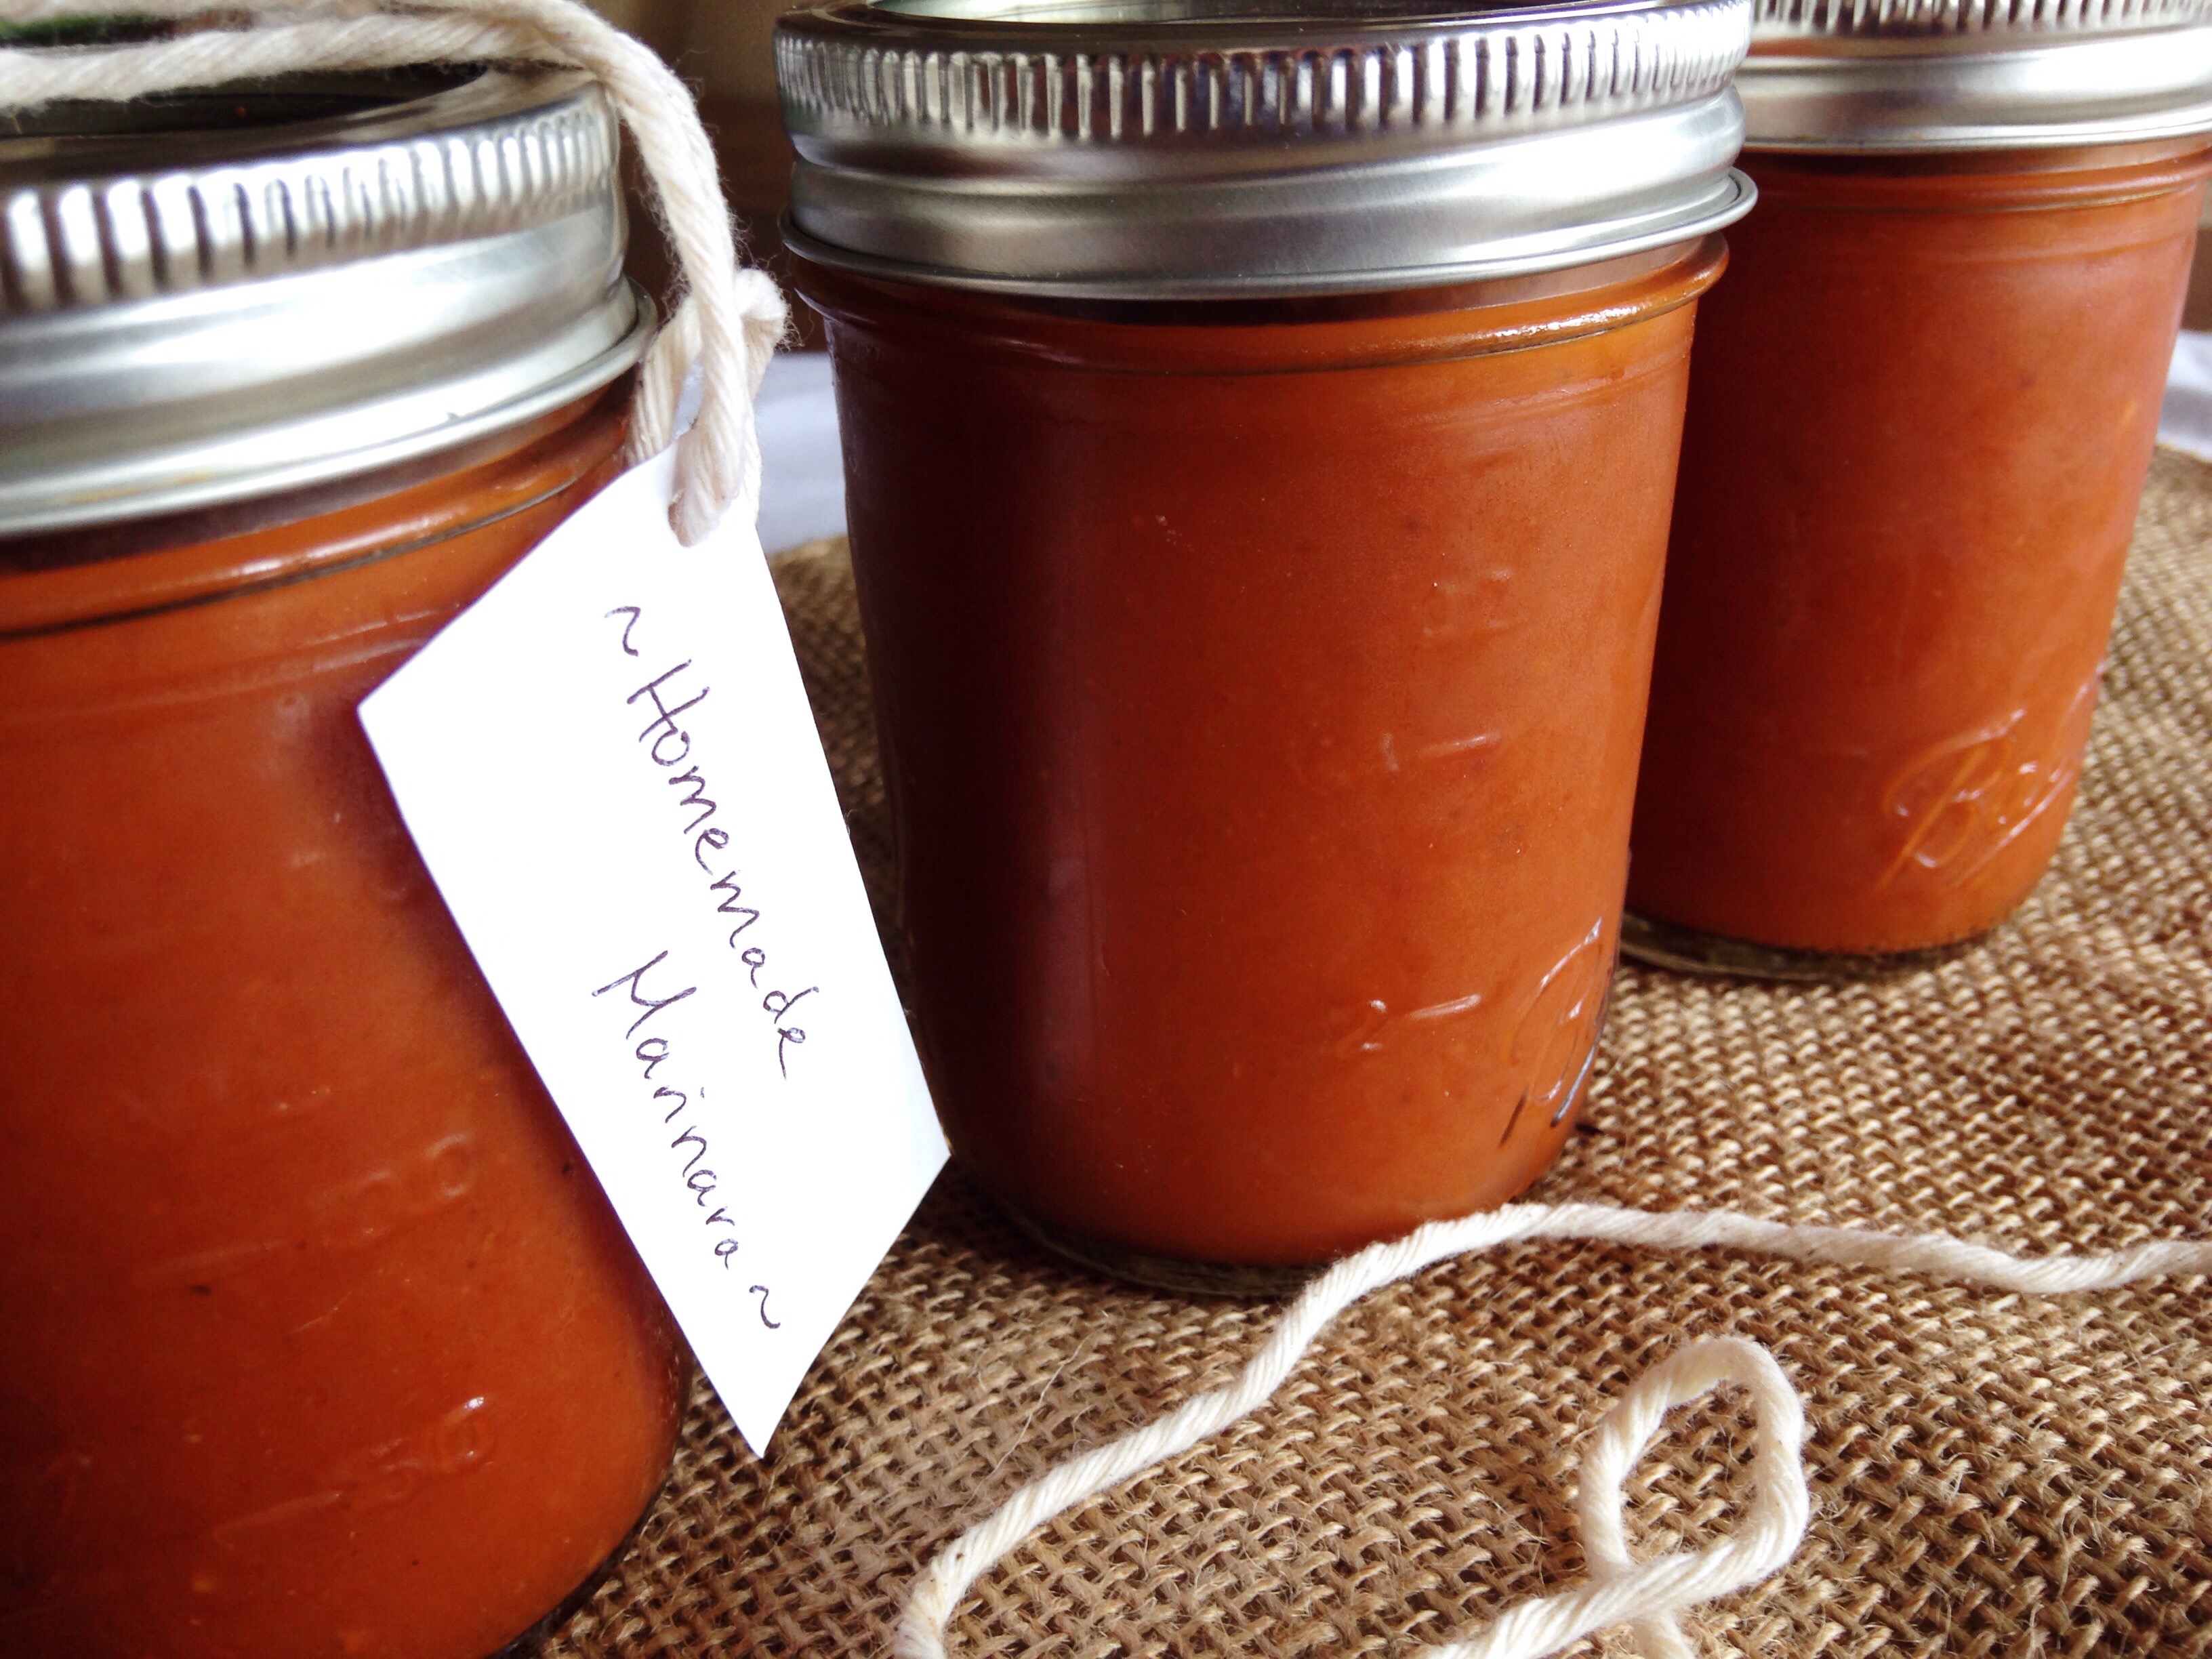
This month’s Recipe Redux theme invited us to share our recipe for something that we once purchased, but now make from scratch. I am happy to share this marinara recipe, a healthy, low-sodium alternative to the jarred stuff. Don’t worry if you can’t eat it all at once, it freezes amazingly and also makes the perfect gift.
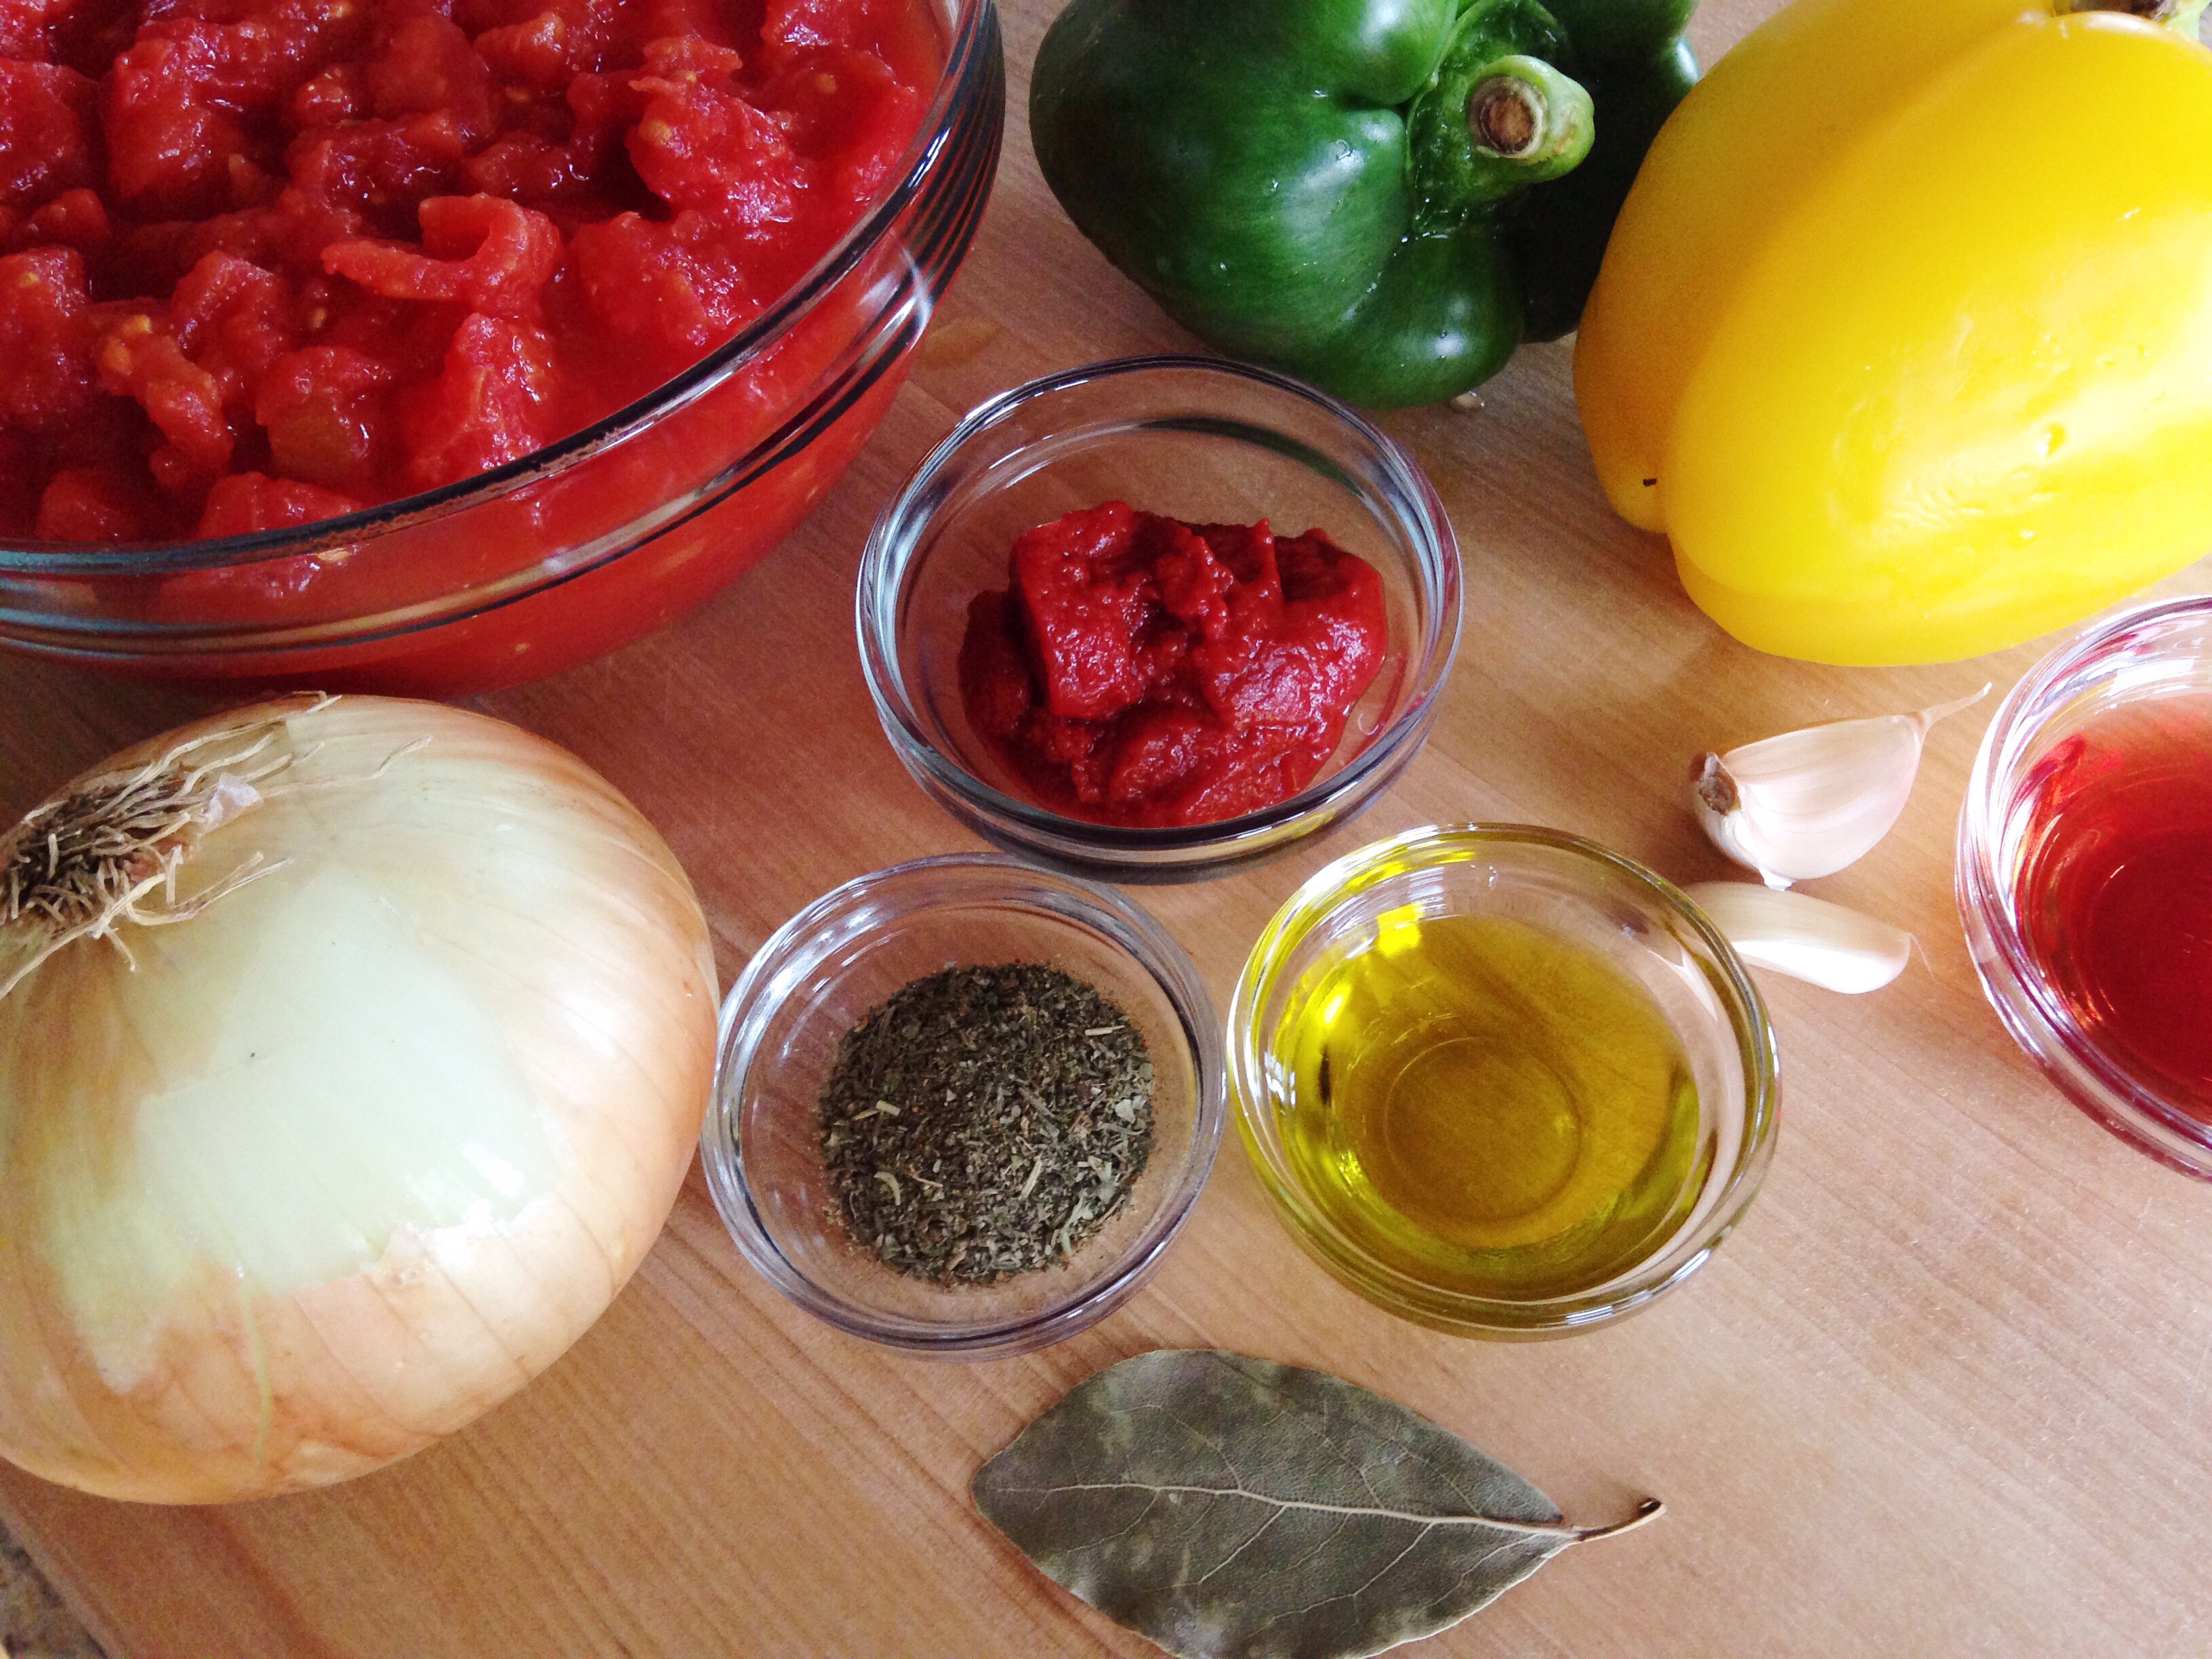
Simple ingredients are the key to this marinara.
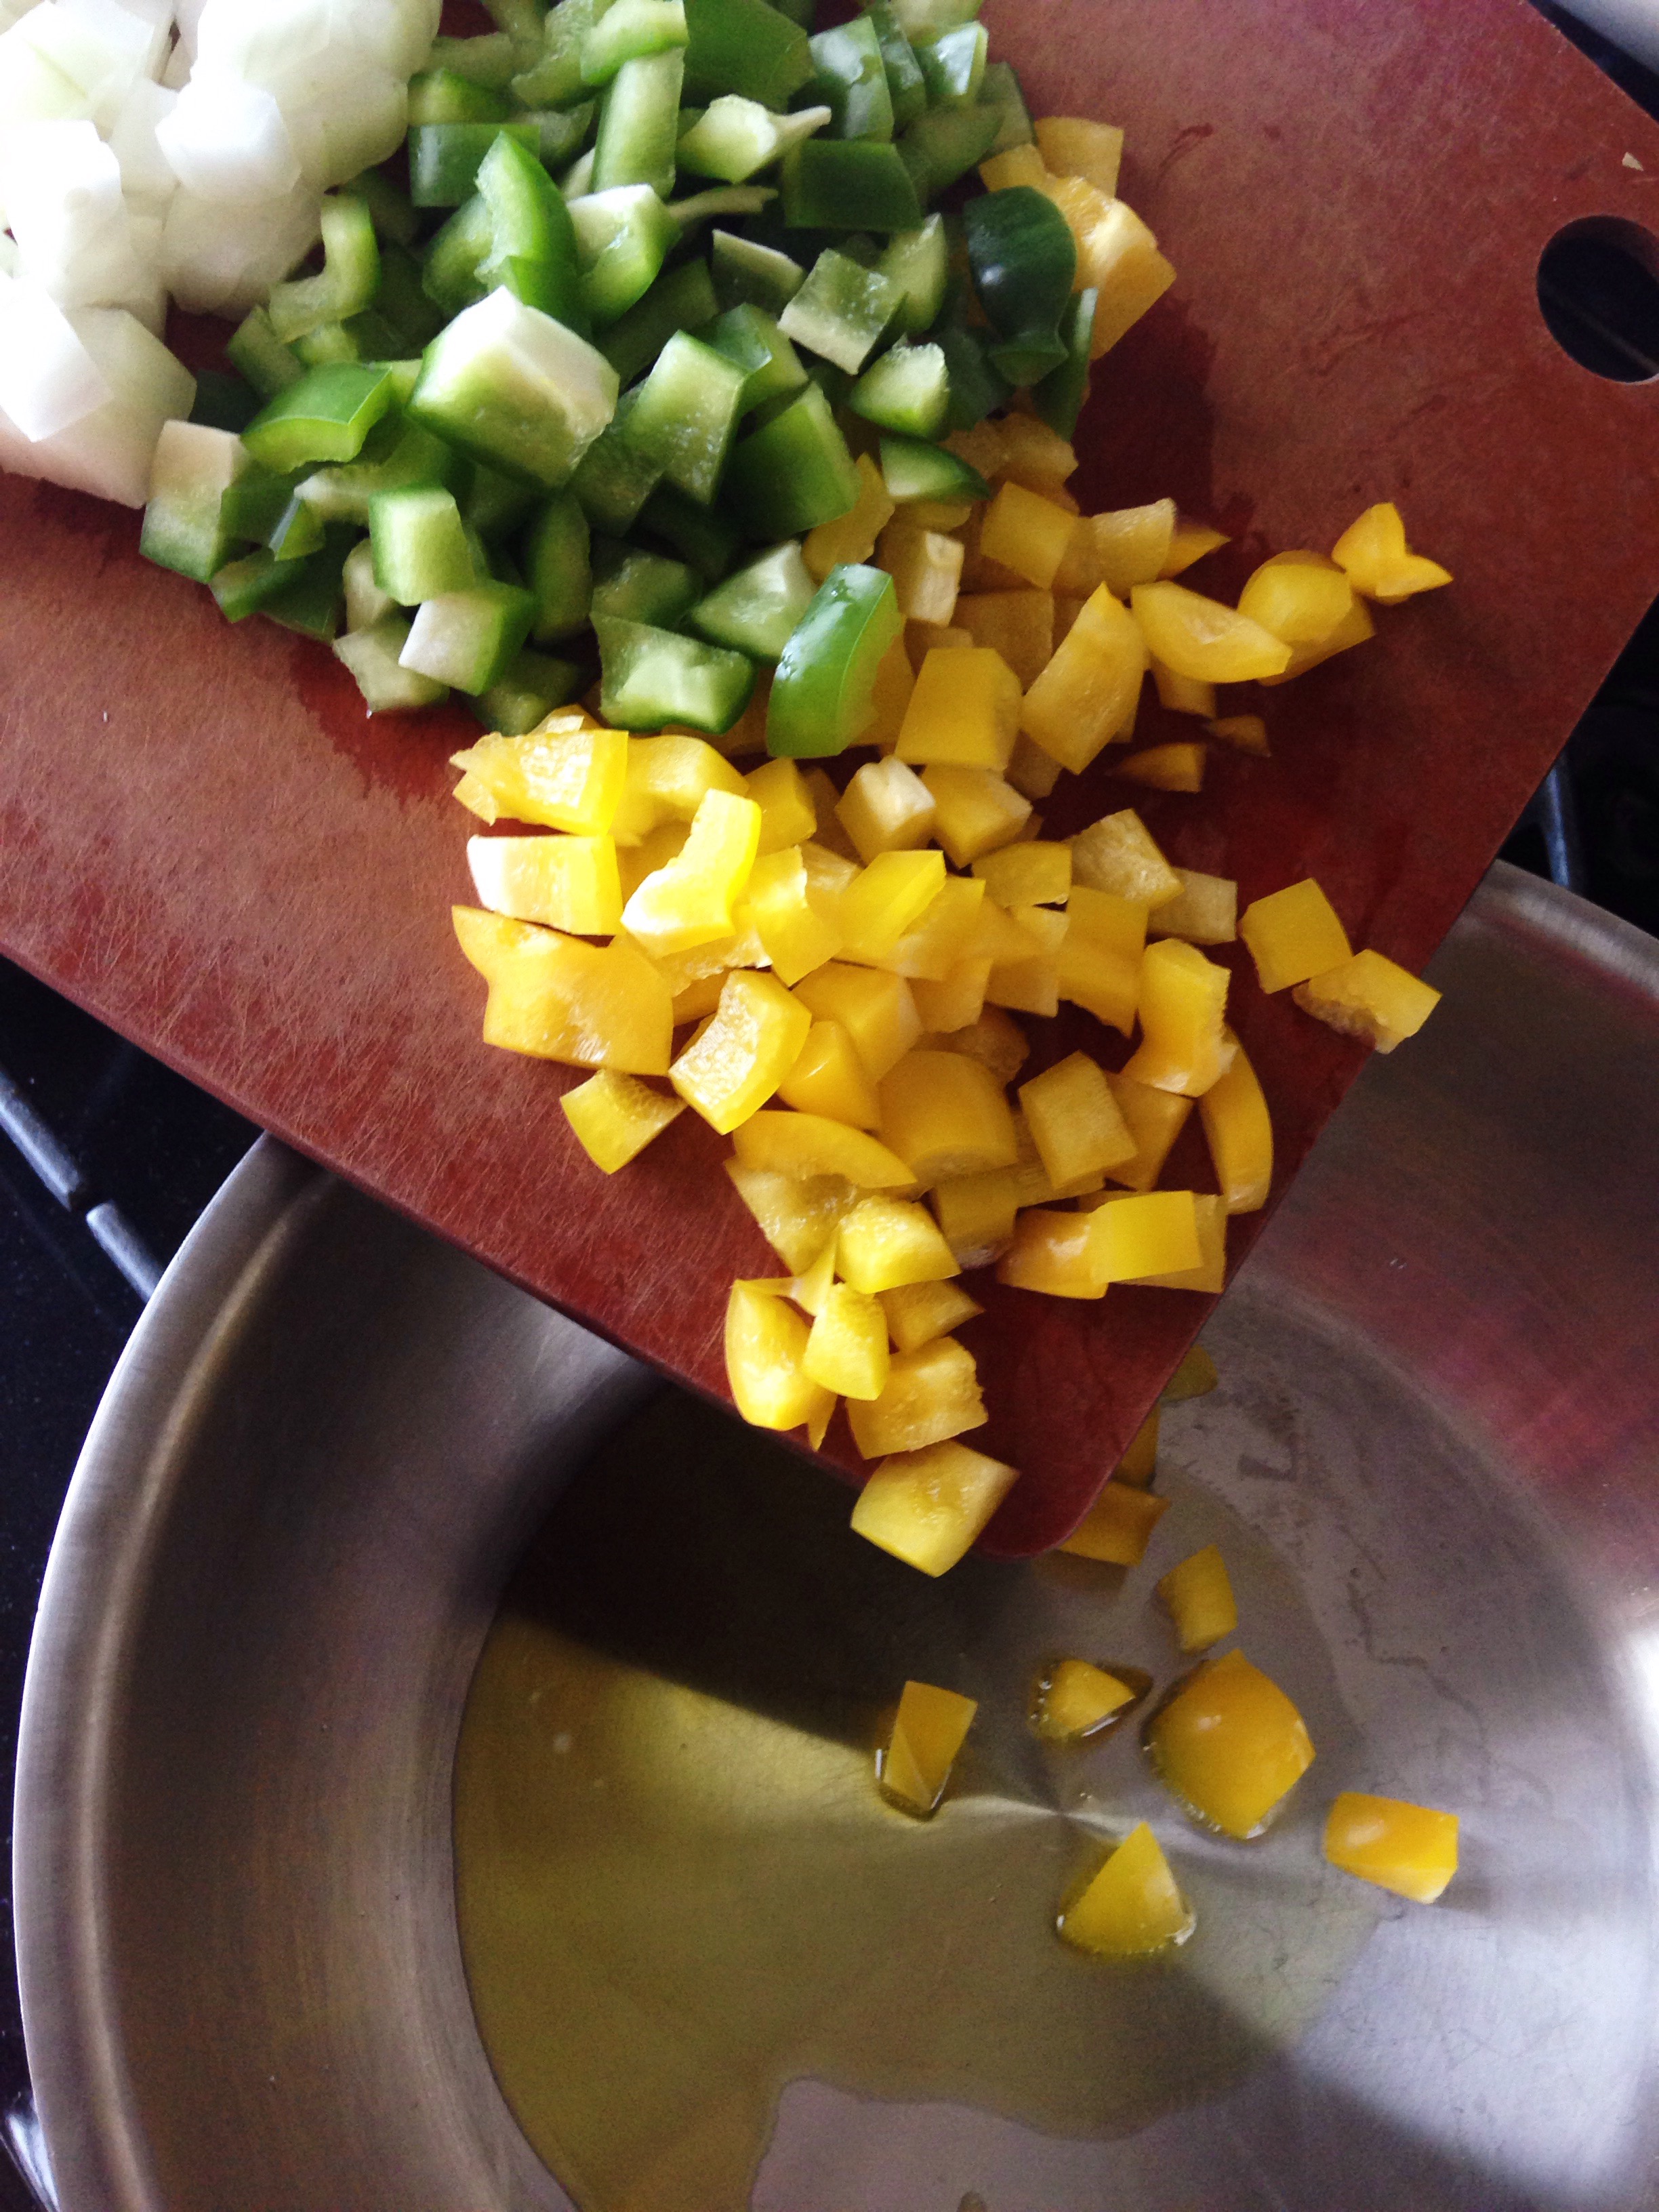
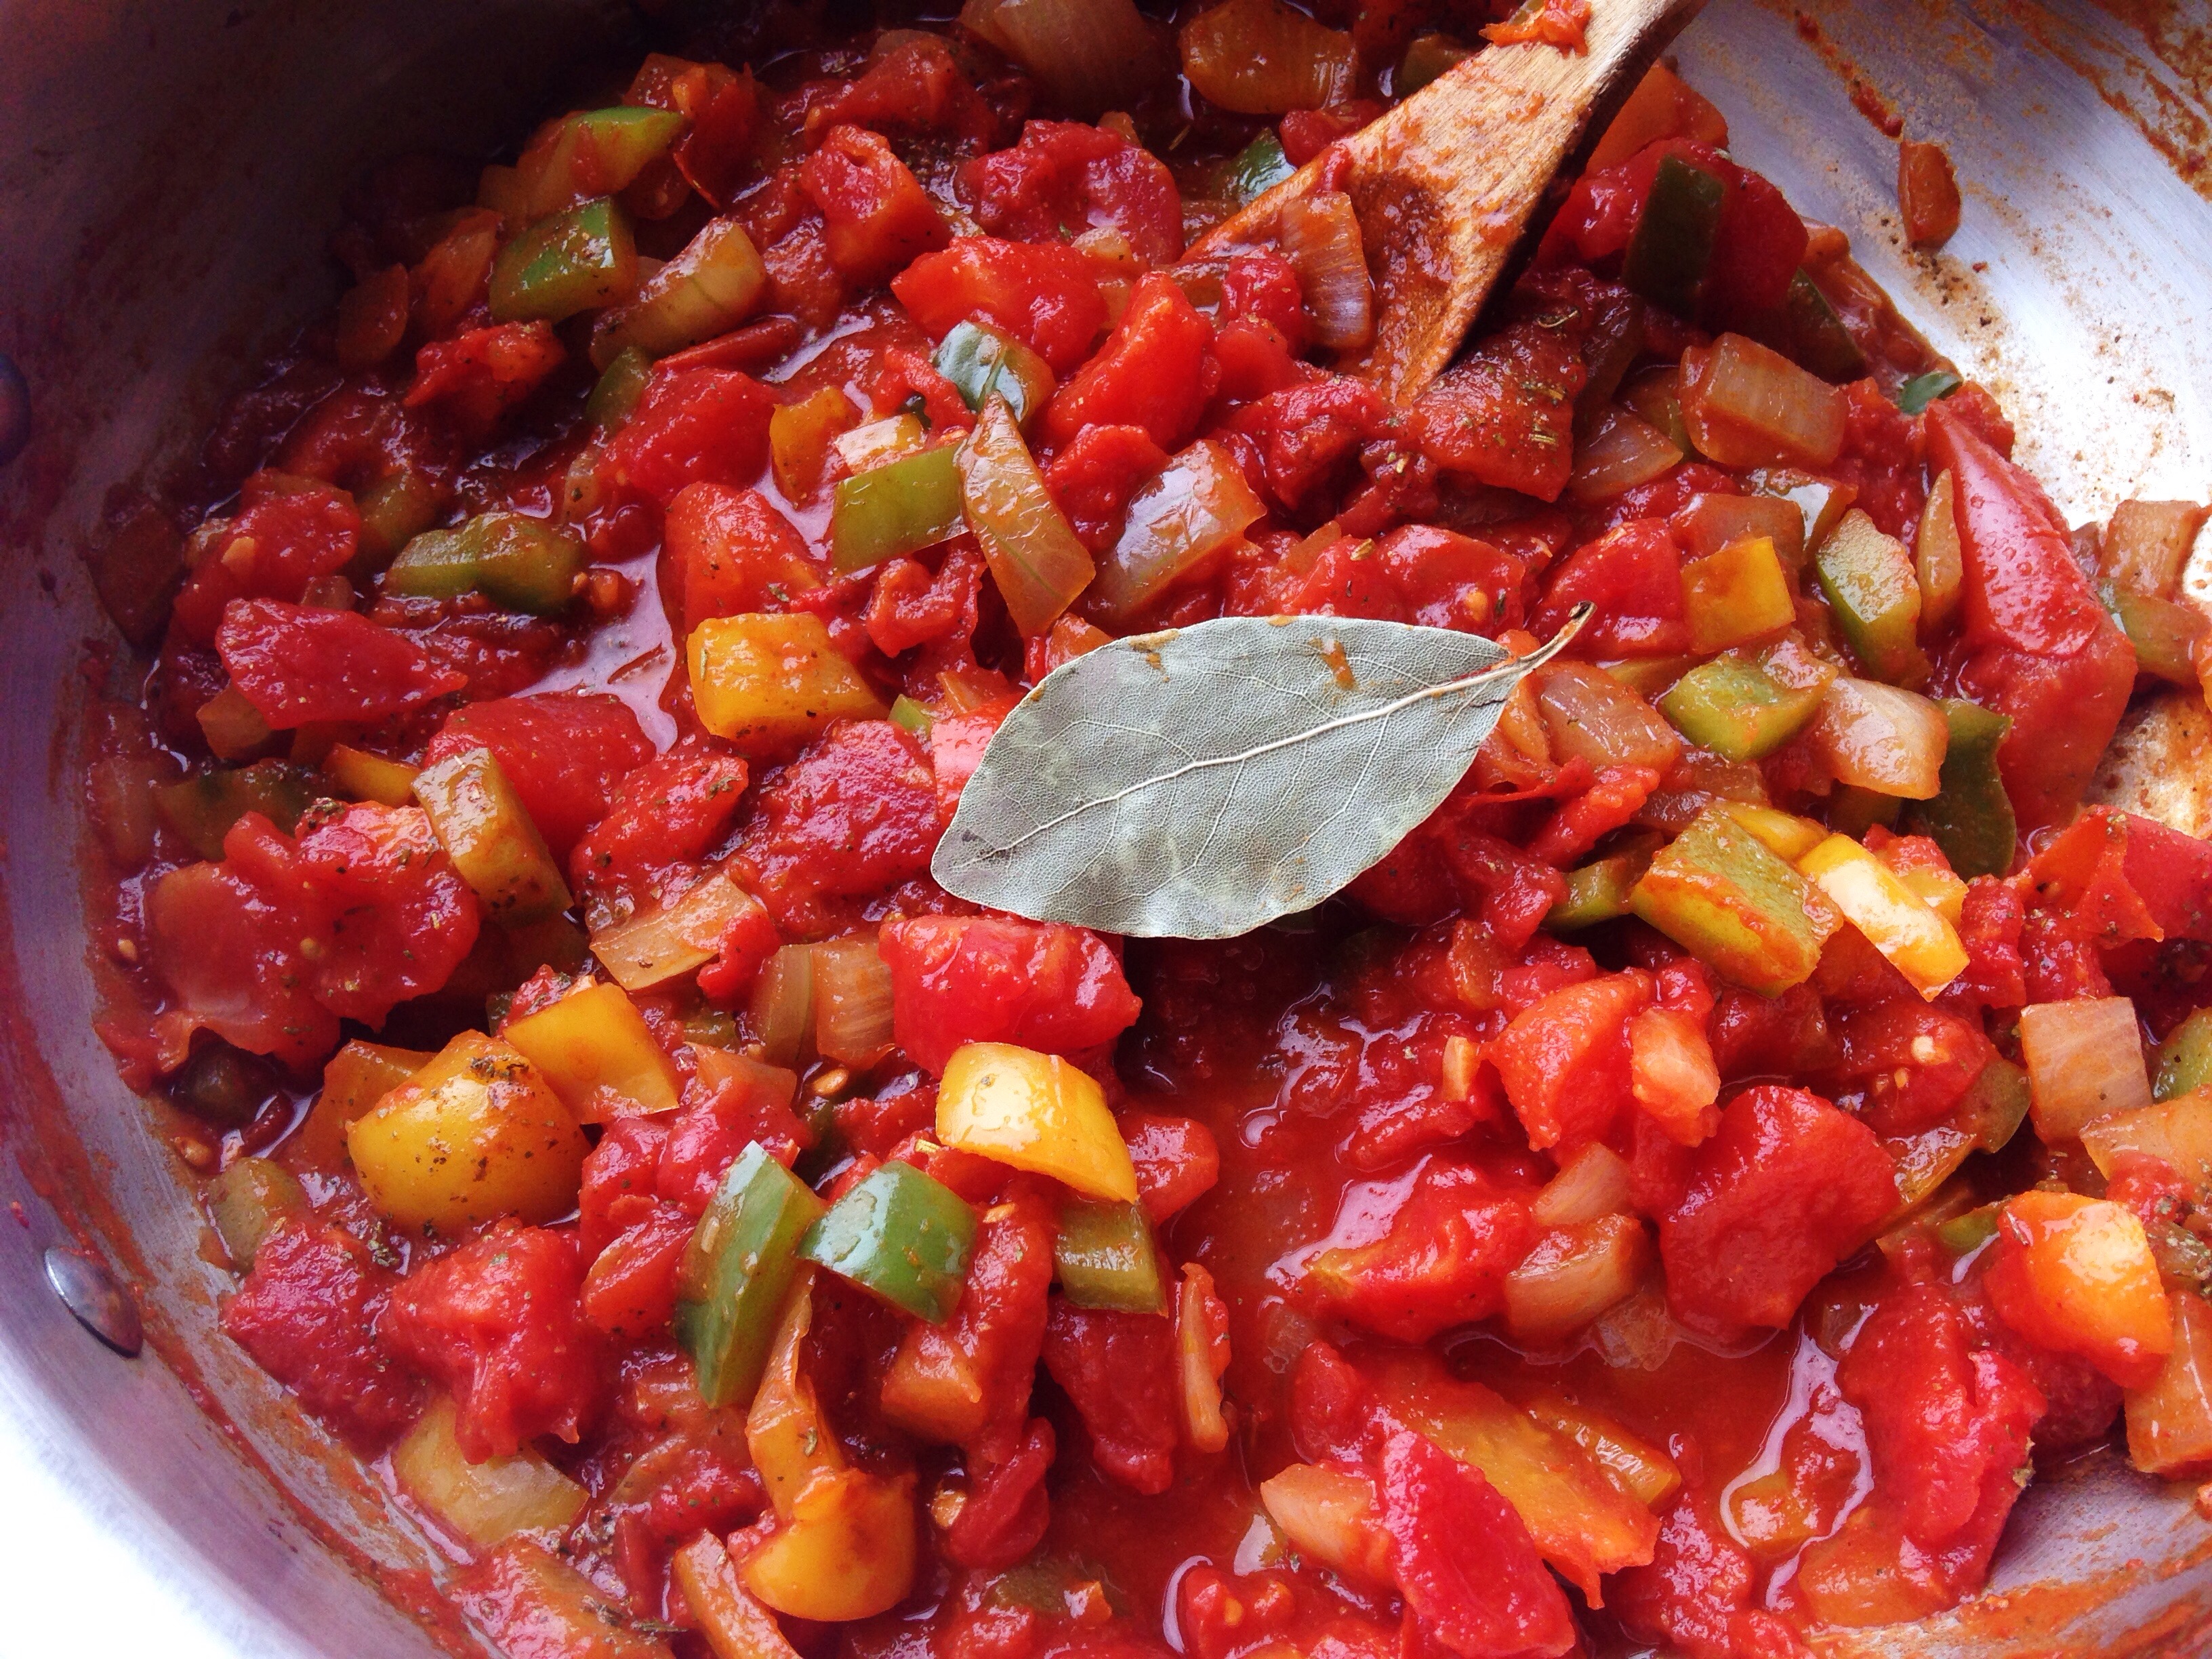
Peppers, onions and garlic add the right touch of sweetness and complexity.
Bay leaf is a perfect, flavorful addition.
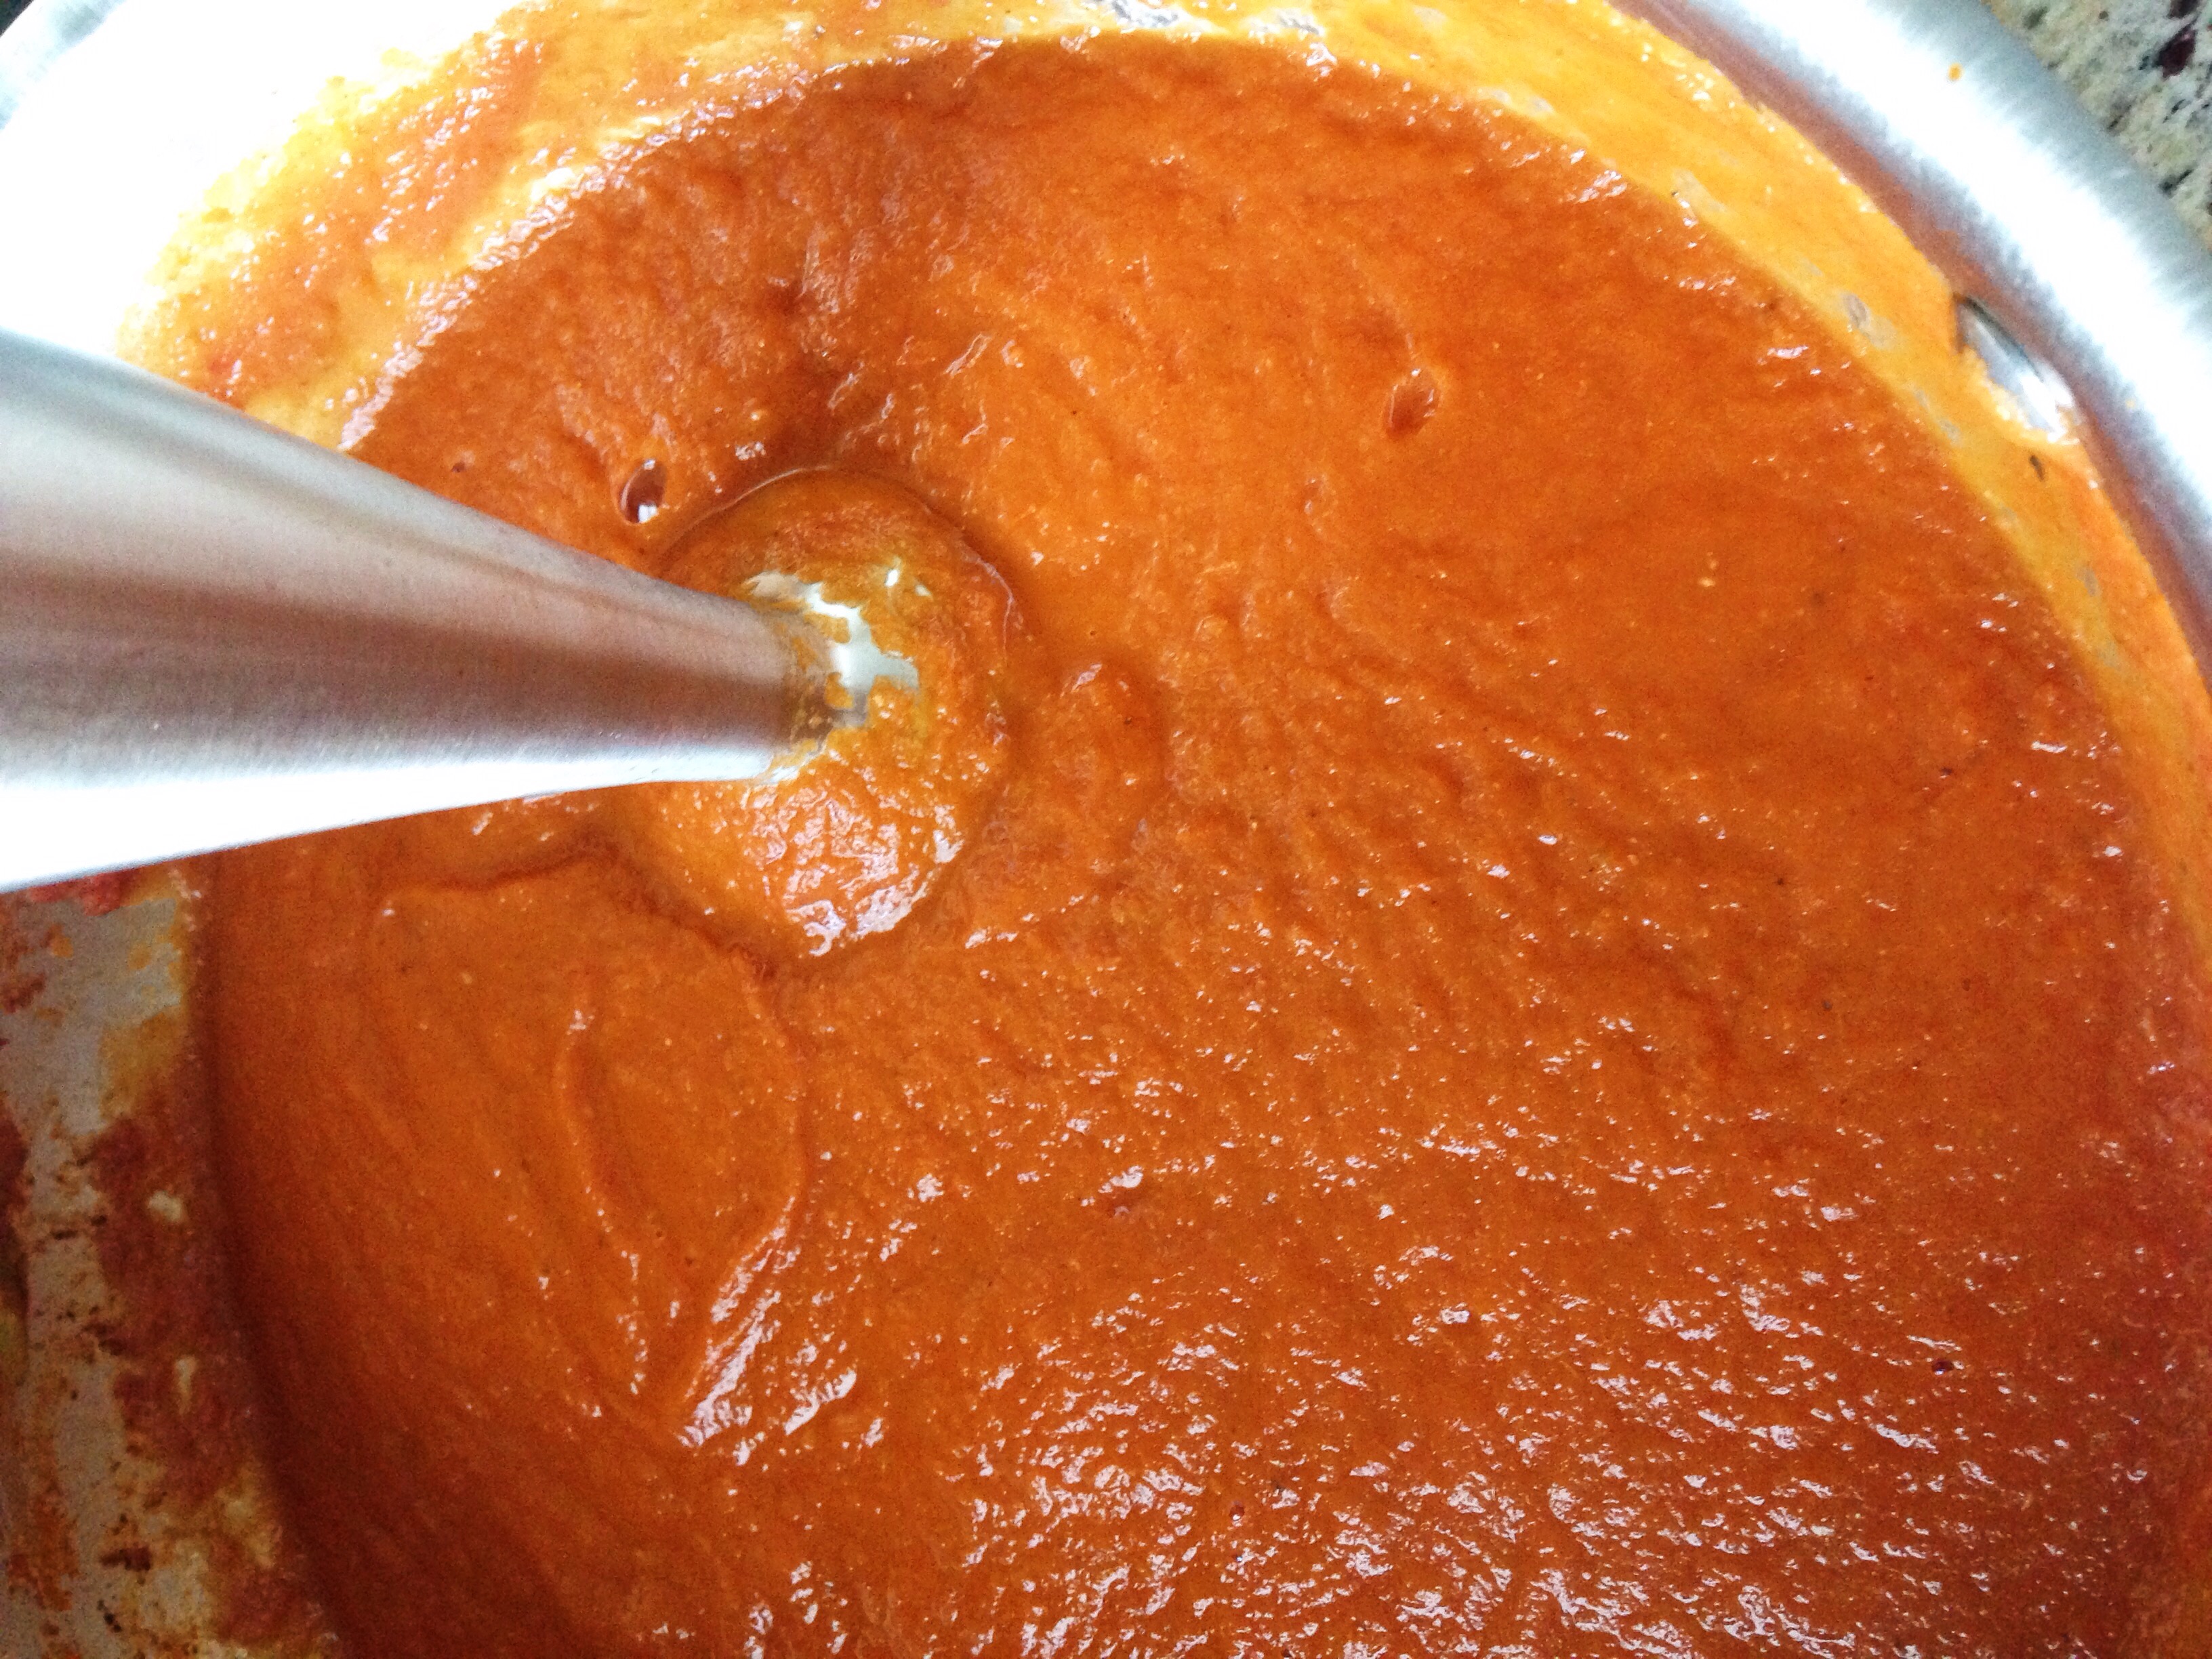
This marinara can be blended right in the pan, but be careful with the hot liquids!
A simple homemade tomato sauce that’s perfect for pizza or tossed with pasta.
Ingredients
Scale
1 tablespoon olive oil
1 medium onion, diced
1 red (or yellow) bell pepper, diced
1 green bell pepper, diced
2 cloves garlic, minced
1 tablespoon tomato paste
1 can (28 ounces) diced tomatoes
1/4 cup water
2 tablespoons red wine vinegar
1 teaspoons Italian seasoning
1 bay leaf
1 tablespoon brown sugar
1/4 teaspoon sea salt
Instructions
Heat the oil a deep-sided sauté pan set over medium-high heat. Once the oil is hot, add the onion and the peppers and cook, stirring frequently until vegetables are slightly tender, about 10-12 minutes. Add the garlic and cook one more minute. Add the tomato paste, stirring constantly, and cook for 3 more minutes. Add the diced tomatoes (entire can with juices), water and vinegar. Stir, scraping the bottom of the pan to lift off any of the brown bits stuck to the pan. Add the Italian seasoning, bay leaf and brown sugar and bring to a boil. Reduce the heat to a simmer, cover and cook for 30 minutes and up to 1 hour.
Remove the bay leaf and add the salt. Using an immersion blender, carefully puree the mixture until smooth. Alternatively, work in batches using a blender or food processor for pureeing, exercising caution with the hot mixture (follow manufacturer’s instructions for pureeing hot or warm ingredients).
Use immediately or allow to cool then refrigerate or freeze.
Notes
This recipe makes about 4 1/2 to 5 cups of marinara.
When did a sandwich become a wrap and who had that brilliant idea? More importantly, why didn’t I come up with it? Joking aside, I love the idea of wraps. How many times have you picked up a sandwich only to have all the ingredients fall out of it? Or the mustard or pickle juice ends up all over your hands? With a wrap, you never have to worry about those things.
I love when Recipe Redux time rolls around each month. It gives me inspiration for creative time in the kitchen, which I love. This month’s theme is “stop being wasteful and use the stuff that’s been sitting in your pantry!” Ok, that’s just my summation of the theme. It was put more eloquently of course, but that’s basically it. Pick something that’s been in the pantry for awhile and put it to good use. Great idea!
So off I went to my pantry, on the hunt for something inspiring. I opened the door and immediately (and embarrassingly) noted its “fullness.” Ugh, there was plenty of food in there that was simply begging to be used. So I acknowledged my pantry with a quick “noted” comment and promised to cook and use that food before it went to waste. Then it was back to my original task…finding the one thing that’s been in there for far too long. After a quick inventory, it came down to three things: brown rice, canned diced chiles and light coconut milk. A glance at the packages revealed that the light coconut milk would be heading to the trash can soon if I didn’t use it, so the light coconut milk was the winner. Now, just what was I going to do with it?
I immediately thought of Thai food. So many delicious dishes use coconut milk and I had a million (ok, maybe just two or three) ideas running through my head. But then something struck me. Maybe it was the delicious scent coming from the apartment next door, but I swear I smelled waffles. It smelled so amazing, that my thoughts of Thai food were immediately replaced with thoughts of waffles. Then, the light bulb went off and my Vanilla Coconut Whole Wheat Waffles were born.
I adore waffles which made this recipe even more fun to create! They are a great breakfast option, especially when all-purpose white flour gets replaced with whole wheat flour and when a simple topping of fresh fruit is the perfect finishing touch. Coconut milk and a little toasted coconut add a fun tropical twist and the vanilla bean paste add just the right of balance and “sweetness.” These are a perfect treat for breakfast or a handy snack. Try these waffles and I promise you’ll fall in love.
Ok, so my part is done…now it’s time to take a look at what’s in your pantry!
Yields about 10 Belgian-style waffles, 4-inches by 4 1/2-inches
Ingredients
Scale
1 cup whole wheat flour
3/4 cup whole wheat pastry flour
1 1/2 teaspoon baking powder
3/4 teaspoon baking soda
1/4 teaspoon salt
1 teaspoon ground cinnamon
1/4 cup ground flax seed
2 large eggs
1 cup light coconut milk
3/4 cup low-fat milk
2 tablespoons melted butter (or canola oil)
1 tablespoon vanilla paste
1 tablespoon packed brown sugar
1/2 cup + 2 tablespoons flaked coconut, toasted
1 mango, peeled, seeded and diced
Instructions
Preheat the waffle iron.
In a mixing bowl combine the flours, baking powder, baking soda, salt, ground cinnamon and flax seed.
In a separate mixing bowl whisk together the eggs, milks, butter, vanilla and brown sugar.
Pour the wet ingredients into the dry ingredients and stir until just combined. Note that the batter will be slightly lumpy. Gently stir in the coconut.
Cook waffles following waffle iron manufacturer’s instructions.
Serve garnished with freshly chopped mango and toasted coconut.
Notes
These waffles freeze well. Place them in a freezer bag, separated by pieces of parchment and freeze until ready to eat!
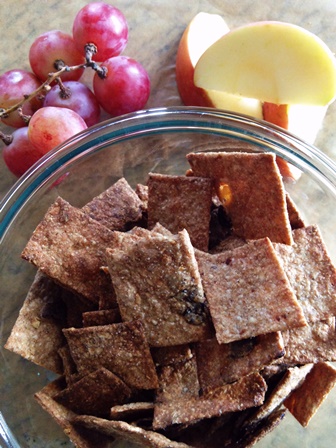
In my house, we eat a lot of crackers. It’s almost slightly embarrassing the number of boxes of crackers we go through in a month. After buying a box at a time, I finally succumbed to buying in bulk. Ironically, even though we chow-down on them, I hadn’t thought much about the crackers themselves until this month’s Recipe Redux challenge. This month’s theme is to take a recipe that we have already made and essentially “re-purpose” it. I was excited and decided my first step should include a quick trip through my blog.
You know where that landed me? Right on the granola recipe I use and make at least once a month. It’s a great one, adapted from a recipe I found on Martha Stewart’s website for Honey-Pecan Granola. At that moment, all I could think was, “wouldn’t this be a yummy base for a cracker?” Which got me thinking even more which led me to wonder why I am buying all of these silly crackers at the store when I can make them at home?
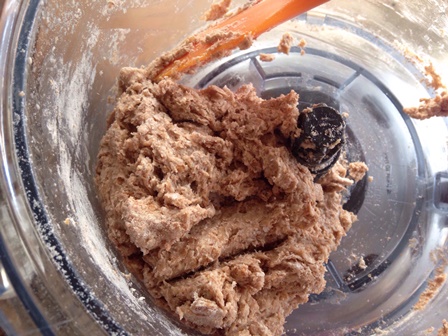
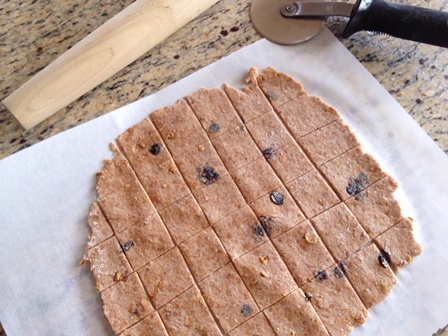
Making crackers is super simple and requires very few ingredients. After a little tinkering, I came up with a recipe that has now become a household favorite. The best part about it is that it’s a perfect way to get your kids involved in the kitchen. They can help roll out the dough and if they’re old enough, they can help cut (using a pizza cutter with an adult close by!) the dough into crackers.
Use my recipe as a base, but feel free to experiment with your own additions. I topped mine with a little dusting of cinnamon and sugar, but you can also add spices and fresh herbs like thyme or rosemary. This is my gentle push, encouraging you to put that box of crackers down and make your own!
And here are some pics to guide you along the way!
Simple ingredients!
Using a food processor makes the task even easier!
A simple, homemade cracker recipe filled with plenty of flavor.
Ingredients
Scale
1 1/4 cup whole wheat flour
1/4 teaspoon salt
4 tablespoons cold butter, cubed
2/3 cup + 2 tablespoons homemade granola
1/2 cup water
1/4 cup currants
Instructions
In the bowl of a food processor combine the whole wheat flour, salt and the butter and pulse until mixture resembles coarse sand. Add 2/3 cup of the granola and pulse 1-2 times. Add the water a little at a time and pulse until ingredients come together in a ball.
Remove the dough from the food processor and place on a lightly floured work surface. Gently knead in the currants and the 2 tablespoons granola and shape dough into a ball. Wrap in plastic and refrigerate for at least 30 minutes.
Preheat the oven to 400’F. Cut three large sheets of parchment paper, big enough so that each piece will fit on a large sheet pan.
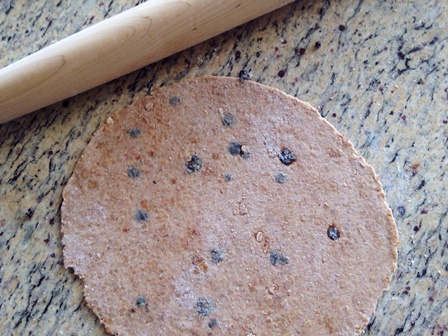
Unwrap the dough and cut into quarters. Take one quarter of the dough and on a lightly floured work surface, roll the dough out into a circle, about 1/8″ thick. Transfer the circle to a piece of parchment and using a knife or a pizza wheel, cut into squares or other desired shape (I like 1 1/2 inch by 1 inch rectangles myself!). Continue the same process with the other 3 pieces of dough.
Move the parchment with crackers onto a large sheet pan and place in the oven. Cook 6-8 minutes or until browned.
Remove crackers from the pan and place them on a cooling rack. Continue the process with the remaining crackers.
Notes
These crackers are tasty by themselves, but also wonderful when sprinkled with a little cinnamon and sugar before baking. The recipe is a good base for trying other flavors too. Add a dash of cinnamon or nutmeg or cayenne. Or try adding more dried fruit or topping with parmesan cheese just before baking.
I need a healthy snack that tastes good,” said no toddler ever. If toddlers had their way, I’m sure they would eat only noodles and cookies. Because I am in charge, I am faced with the challenge of trying to find just that: a healthy snack that tastes good.
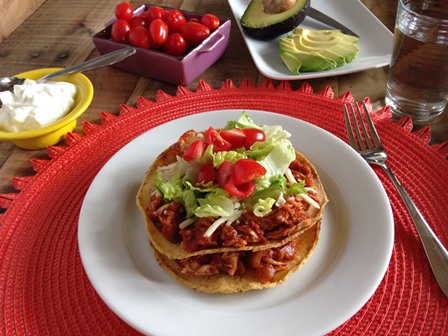
There is something magical about the slow cooker. The idea that you can simply place ingredients in a vessel, touch a button and hours later you have an entire meal is mind-blowing. I love it! For anyone that’s time-strapped (OK, that’s everyone, right!?), the slow cooker is your savior. With a little forethought, you can create beautiful, almost effortless meals that your family will love.
In need of a new slow cooker recipe? Try my version of Mexican Shredded Chicken. It’s a flavorful dish that can feed a crowd…
Click here to read more from The Cutting Board Blog and to get the recipe.
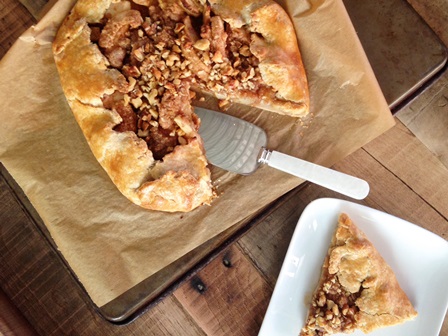
It’s cold here in Chicago and I am happy to report that I have not lost my sense of humor about this cold blast we are having. Instead of being angry, I have chosen to celebrate this cold by baking and cooking…and baking and cooking! Luckily the lovely Cutting Board Blog must have known this, as they are currently featuring my recipe for the beautiful Apple Crostata.
Hurry, go turn on your oven and be prepared to “warm up” with this lovely dessert.
I’m going to let you in on a little secret. Somewhere, hidden deep in the recesses of my pantry is my special stash of chocolate. It’s a secret because, well, I don’t feel like sharing it. No offense to other members of the household, but I just don’t think they would appreciate this little treasure like I do. I hold that stash near and dear to my heart. And thinking about it now, it seems rather ironic that I store it in an old trick-or-treating bucket that looks like a jack-o-lantern…totally classy and mature, I know.
I love chocolate and I have since I was little. Lots of good food memories come to mind when I think of chocolate. Because I love it so much, I suppose that could mean trouble for my waistline. But the good news is, I can control myself because I appreciate chocolate. I see chocolate as a fun indulgence or as a very lovely treat. Because of that, I try to enjoy it and savor it. That means I need less of it!
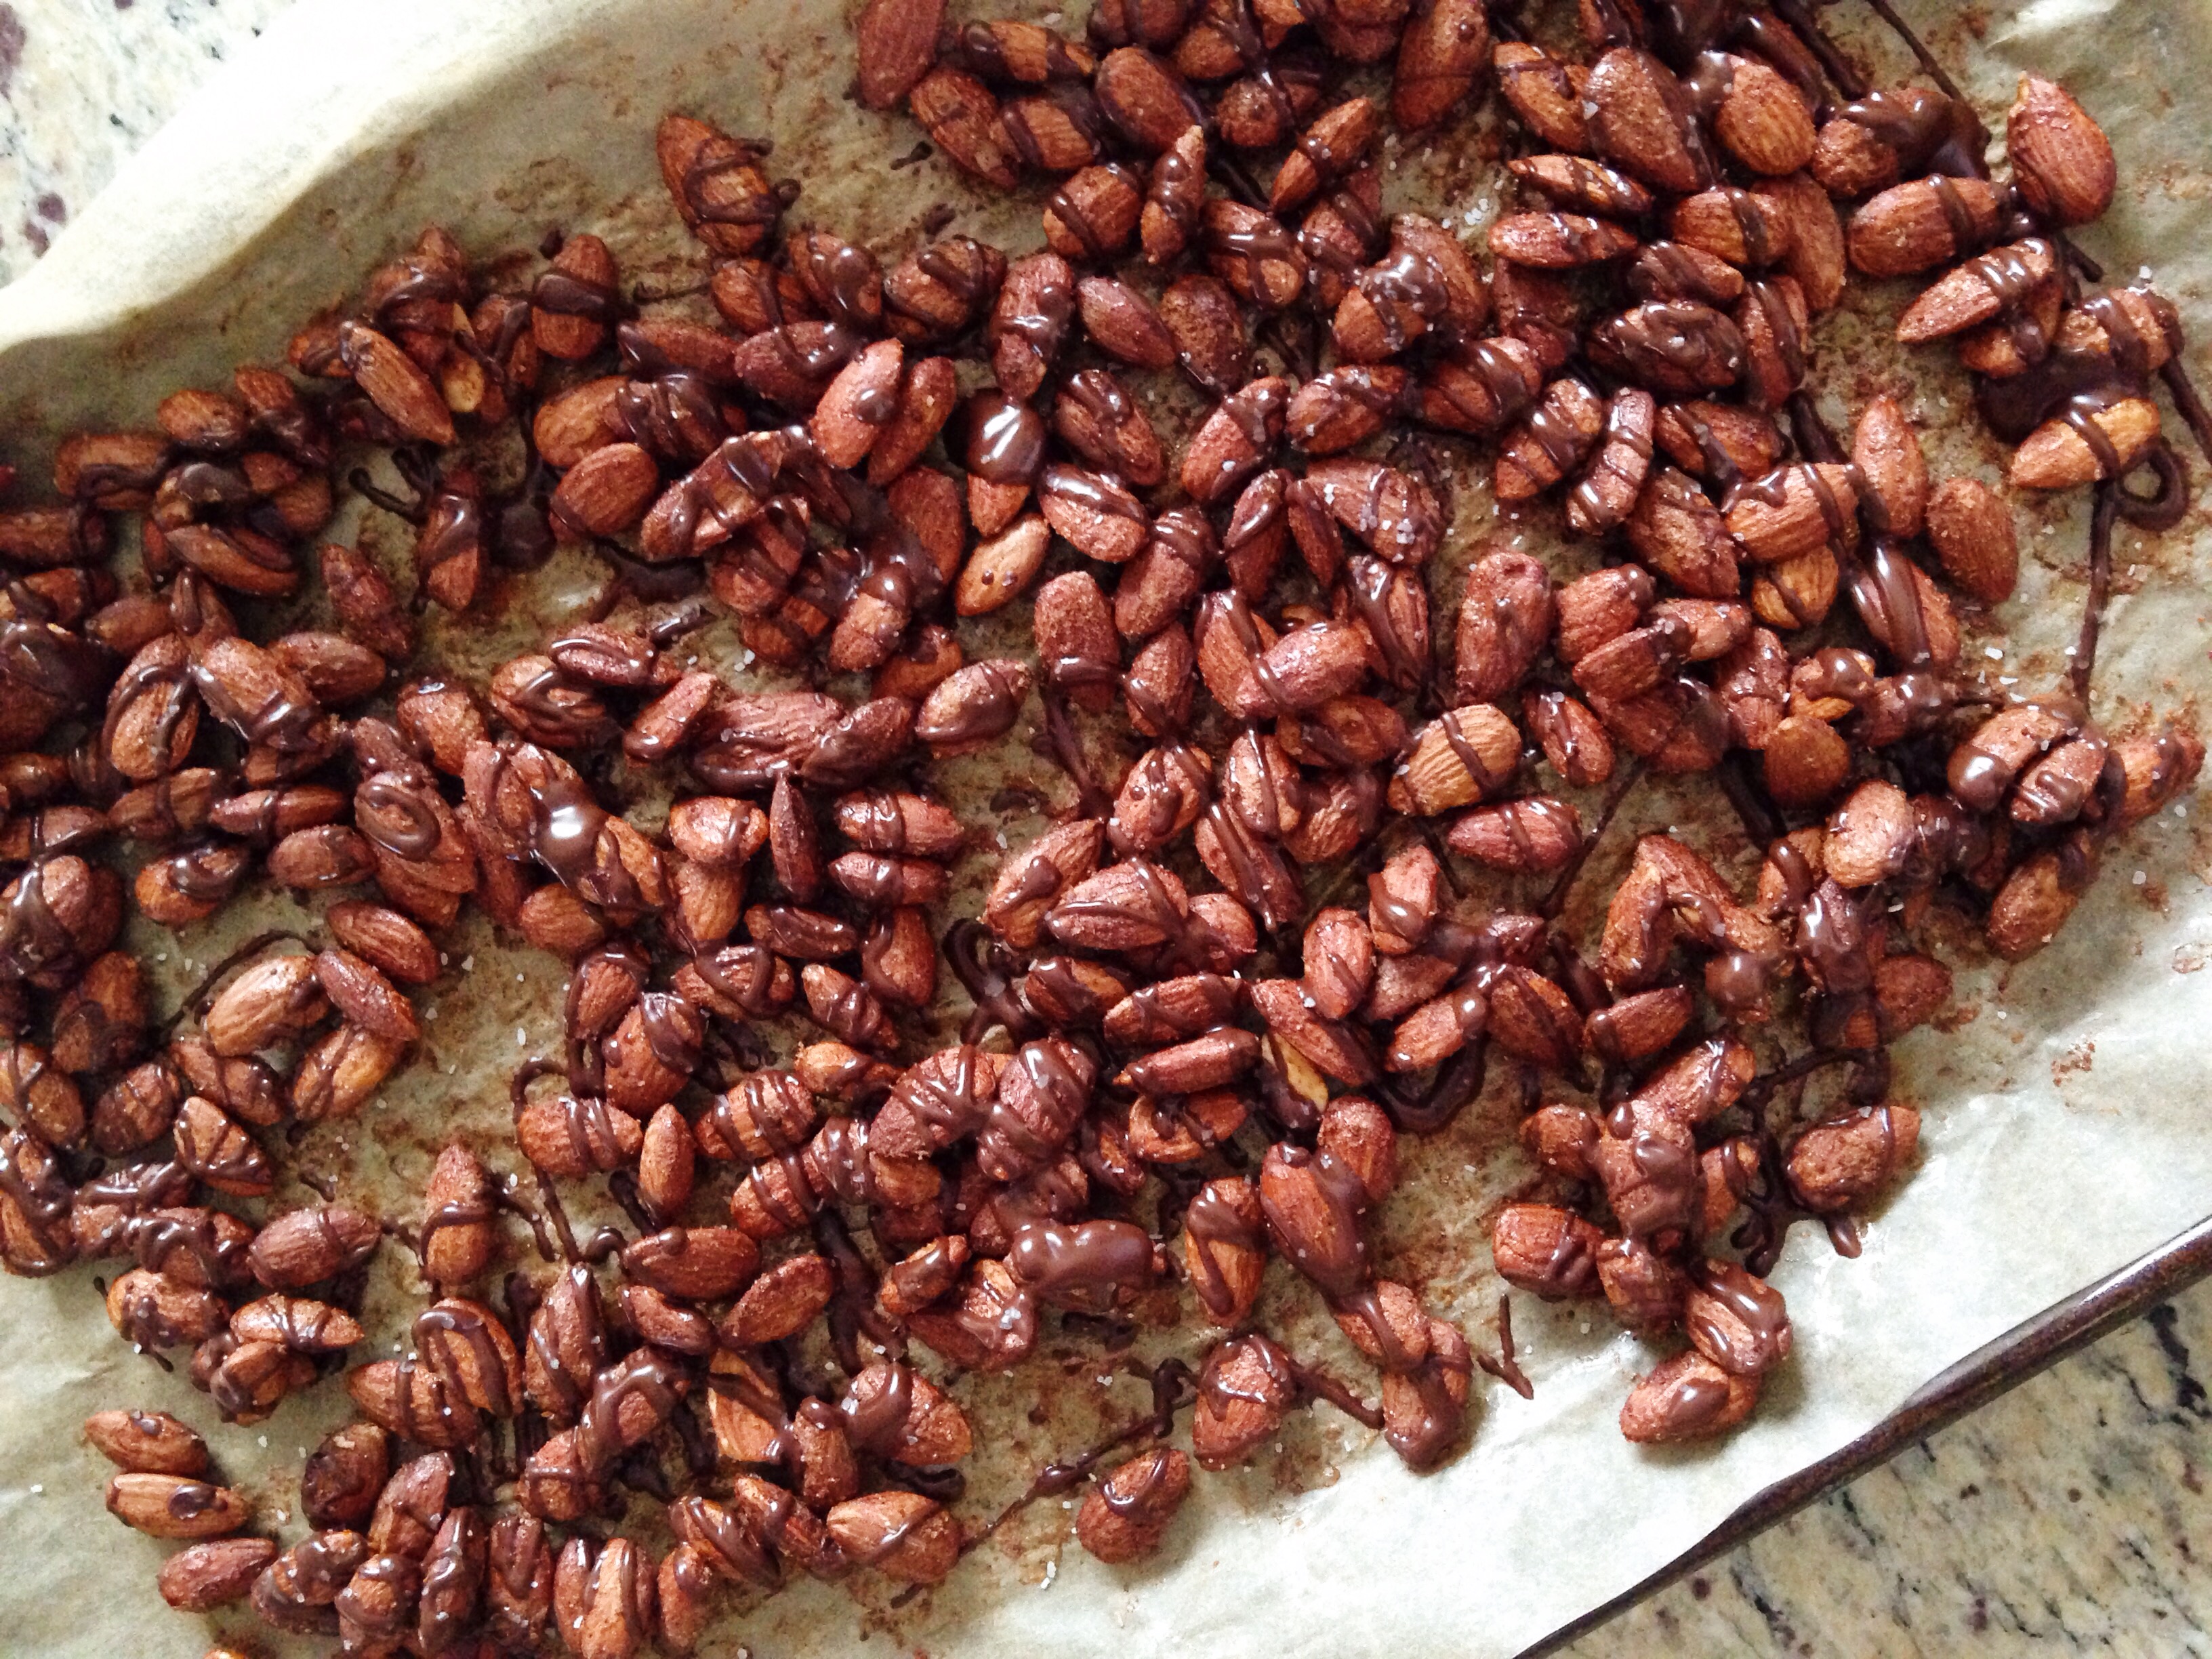
The ladies over at the Recipe Redux must have channeled my inner choco-holic when they came up with this month’s theme – our favorite pairing for chocolate. My mind of course went crazy with ideas. How about a mole? Or what about a twist on a ‘smore? When it came down to it, I decided upon a recipe that I felt would honor both the dietitian as well as the chocolate-lover in me. Reaching for almonds and my secret stash of chocolate, I bee-lined to the kitchen and got to work. I came up with a recipe that is the perfect snack or treat and one that highlights one of my favorite pairings: nuts and chocolate! Yum!
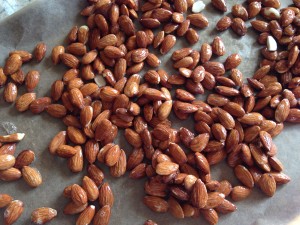
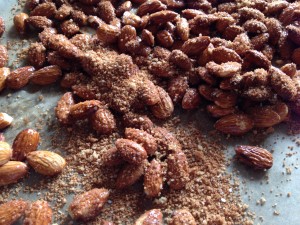
These roasted almonds are a delightful blend of sweet and savory.
Ingredients
Scale
1/8 teaspoon cayenne pepper
3/4 teaspoon ground cinnamon
2 tablespoons brown sugar
1/4 teaspoon Kosher salt
1 large egg white
1 tablespoon water
3 cups whole almonds
2 ounces 60% dark chocolate
Kosher salt for finishing
Instructions
Preheat the oven to 300’F and line a large sheet pan with parchment paper.
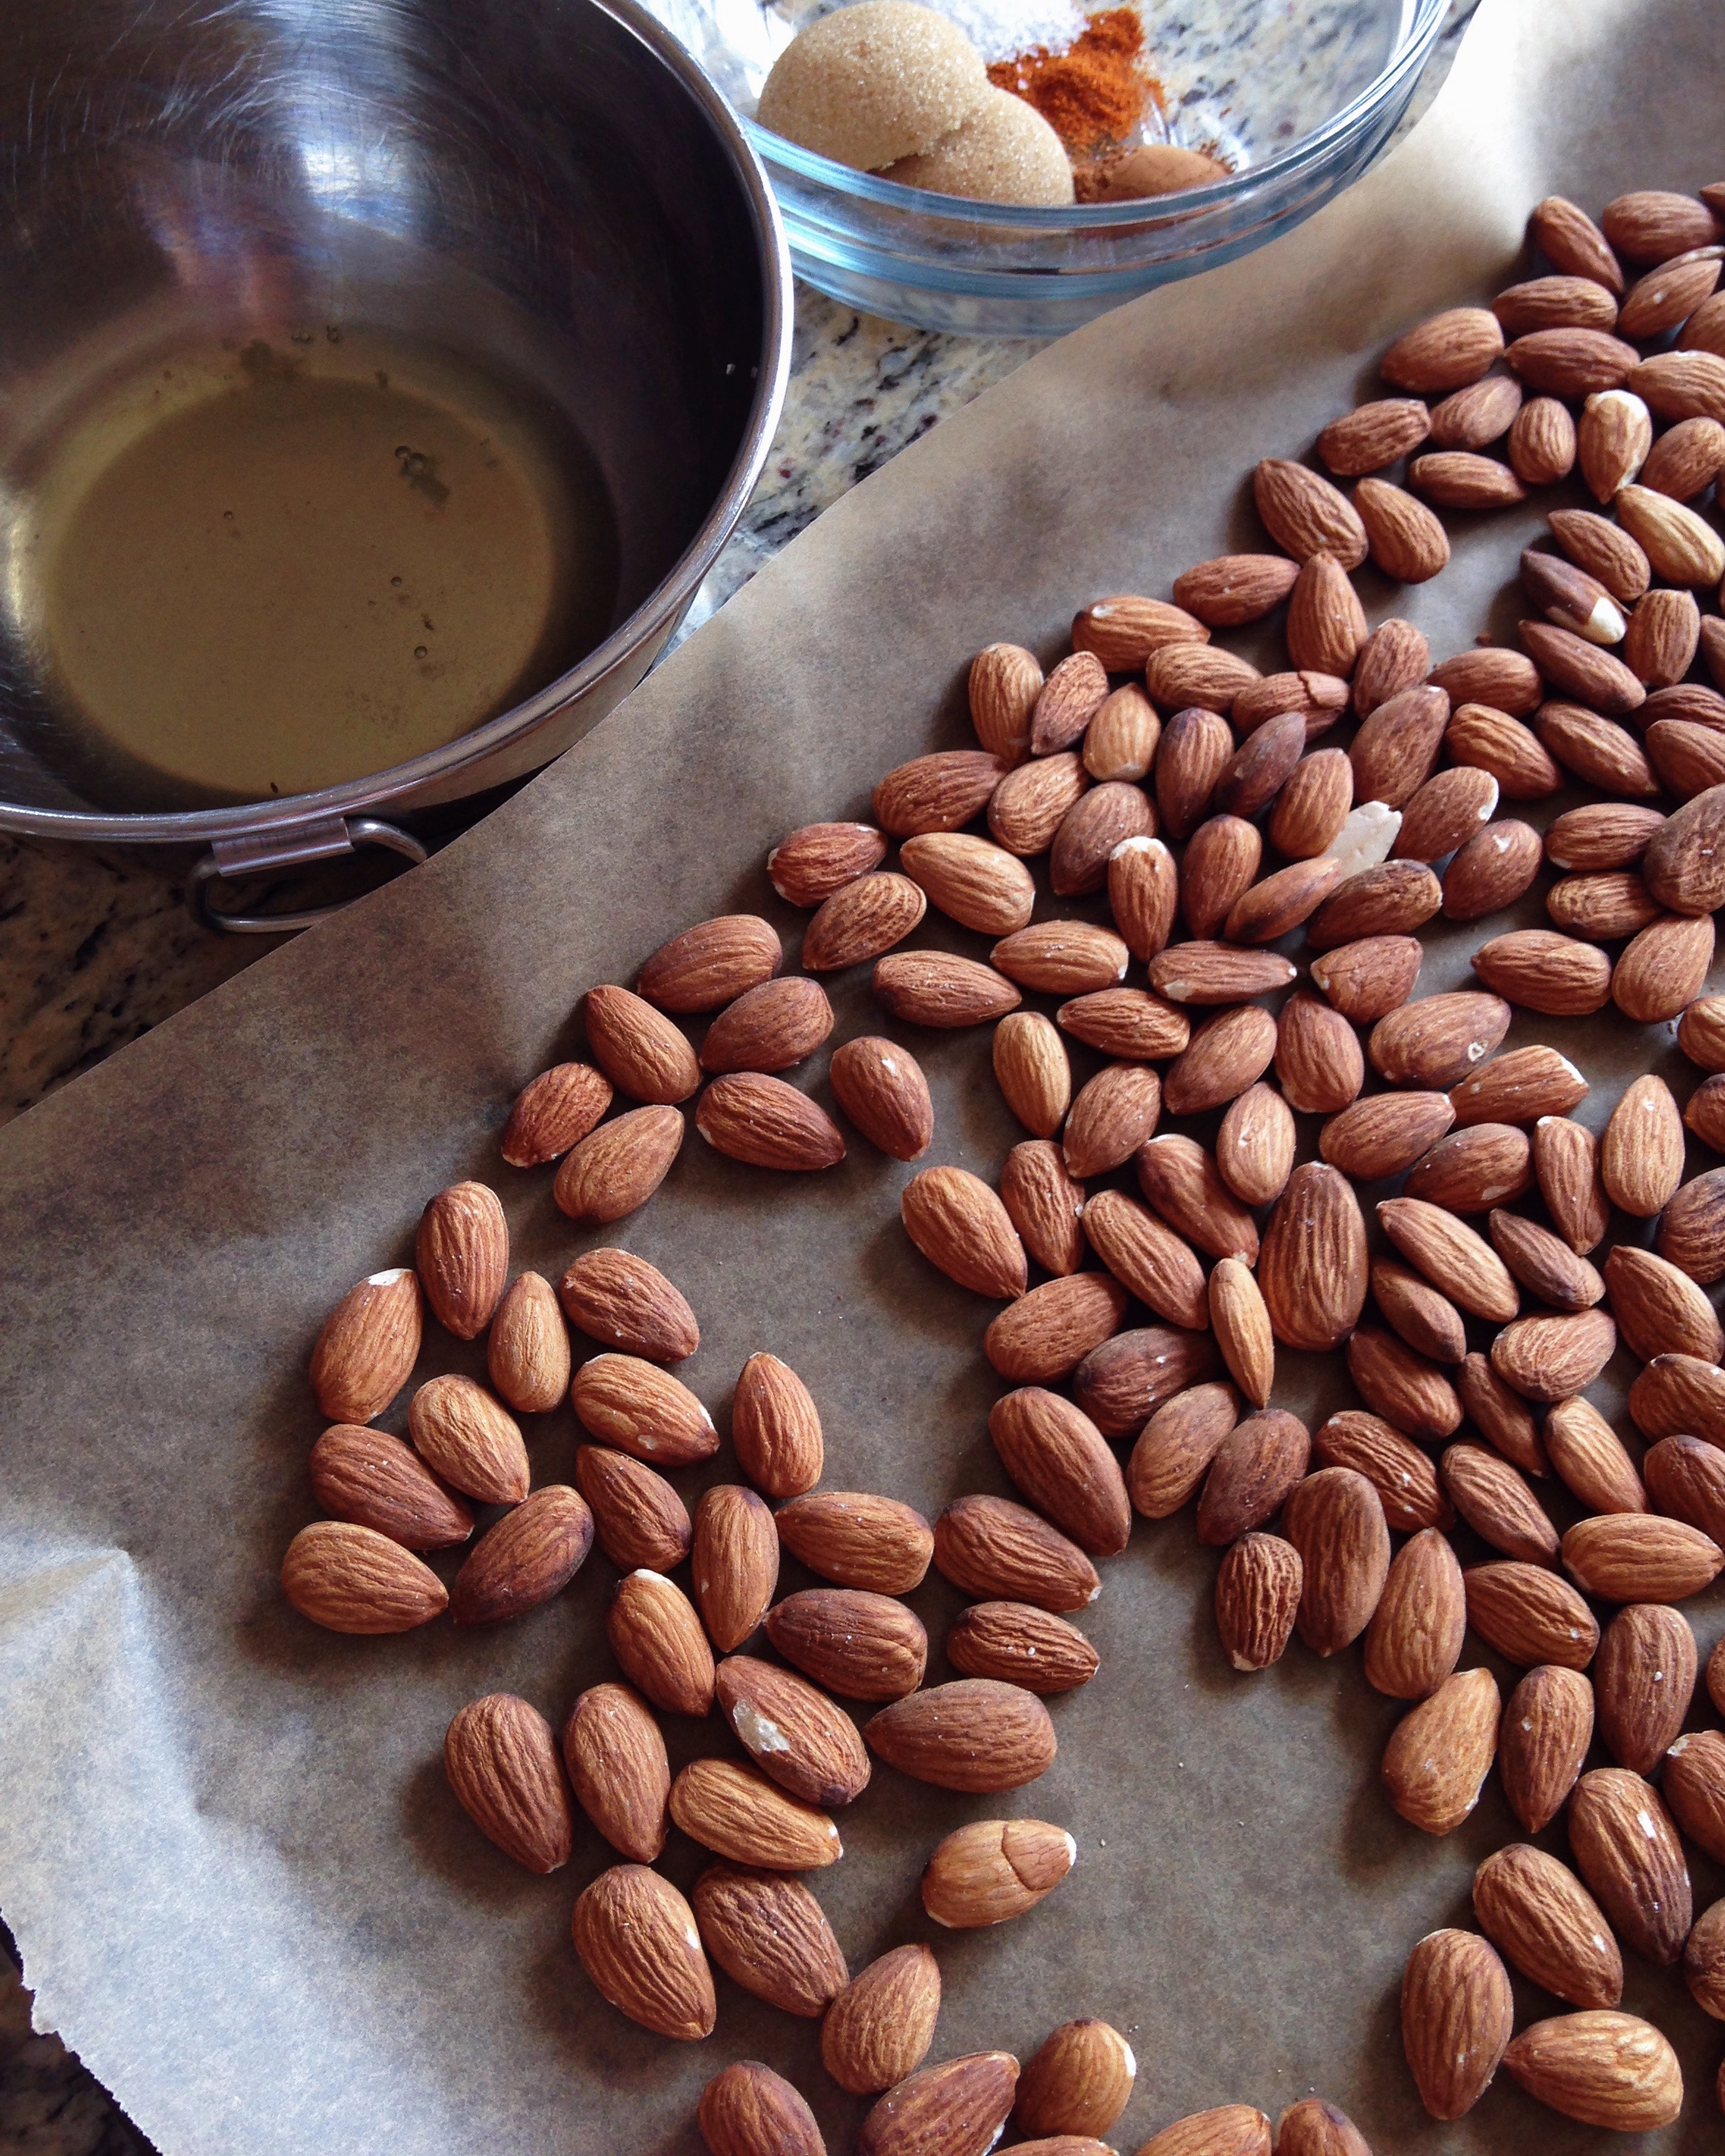
In a small bowl whisk together the cayenne, cinnamon, brown sugar and salt.
In a separate bowl, whisk the egg white and water together just until foamy. Add the almonds and toss to coat. Spread the almonds out onto the sheet pan and sprinkle with the spice mixture. Stir and toss to coat.
Place nuts in the oven and bake for 30 minutes, stirring every 10 minutes. Remove from the oven and let the nuts cool on the sheet pan.
To a small sauce pot add the chocolate and set over low heat. Stir constantly until chocolate is completely melted. Using a small spoon, drizzle the melted chocolate over the almonds. Sprinkle with additional salt as desired (Kosher or sea salt).
Allow chocolate to cool and harden before serving.
Back in my days of my culinary externship I learned all about something called “family meal.” It sounds so nice, doesn’t it? Actually, it was. The concept was that the kitchen staff was to make the meal (usually from leftovers or food on it’s way out in regards to freshness) for all of the employees. I had the fortunate luck of being in a kitchen with a super-talented chef who hailed from Mexico. Every day he made something amazing out of absolutely nothing. I enjoyed every mouthful and learned so much about the Mexican culture. One day he made a dish with dried chiles, and when I asked him what it was called, he told me it was chilaquiles. Well, that meal changed my life. How could just a few simple ingredients make such a delicious plate of food? First, he made a sauce; he washed and seeded some dried chiles and toasted them in a hot pan. Once lightly toasted he transferred them to a bowl and covered them with hot water to soften them. Then he pureed them up with some sauteed onion and garlic and cooked it with a little chicken broth. To that he added strips of corn tortilla and it was amazing! I cleaned my plate and felt inspired.
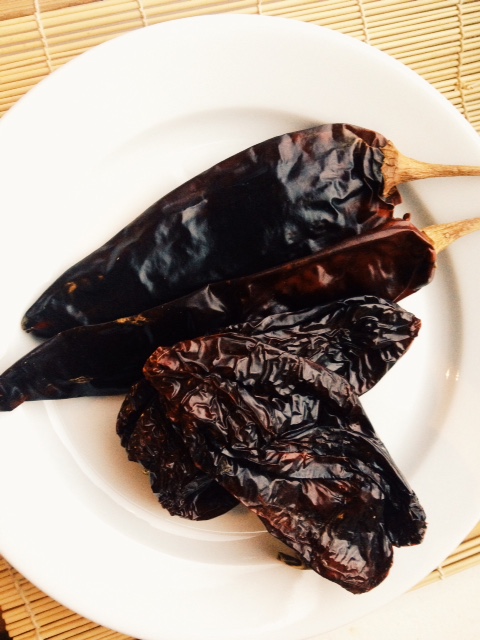
Guajillo and Ancho chiles!
This month’s Recipe Redux challenged us to spice things up. Immediately I thought of that yummy chilaquiles dish, but I wanted to do something to make it my own. Since Mexican food (any of it!) and pizza are my favorite foods, I figured why not use them both!? And that’s how I came up with this riff on a Mexican pizza. It’s full of flavor and by chance, also loaded with good-for-you nutrition.
Enjoy and be sure to keep a glass of water nearby!
Hearty whole grain pizza dough topped with a spicy red chile sauce, black beans and fresh vegetables.
Ingredients
Scale
2 dried ancho chiles, washed, stems and seeds removed
2 dried Guajillo chiles, washed, stems and seeds removed
1 1/4 cup boiling water
1 tablespoon olive oil
1/4 cup finely diced yellow onion
2 garlic cloves, peeled and finely chopped
2 tablespoons fresh lime juice
1/4 teaspoon Kosher salt
1 pound whole wheat or whole grain pizza dough or 1 large pre-made whole wheat pizza crust
1 cup black beans (canned or cooked from dry)
1 red bell pepper, cored and seeded, sliced thin
1 green bell pepper, cored and seeded, sliced thin
1 1/2 cup shredded sharp cheddar cheese
1/2 jalapeno, sliced thinly into rounds
1/4 cup cilantro, roughly chopped
1 green onion, thinly sliced
Instructions
To Make the Red Chile Sauce
Set a skillet over medium-high heat. Add the chiles to the pan and toast until fragrant, about 1-2 minutes. Transfer the toasted chiles to a bowl and pour the boiling water over them. Cover the bowl with plastic wrap and let the chiles sit until softened, about 10-15 minutes.
Remove the chiles from the water and tear into pieces. Place the torn chiles in a blender along with 1 cup of the soaking liquid. Puree until mixture is smooth.
Set the skillet (you can use the same one that you used to toast the chiles) over medium-low heat. Add the oil and once hot, add the onion and garlic and cook until softened, about 5 minutes. Stir in the pureed chile sauce and cook an additional 3-5 minutes. Remove from the heat and season with lime juice and salt. Note: If a smoother consistency is desired, transfer mixture back to the blender and process until smooth. Use caution with hot liquids.
To Make the Pizza
Preheat the oven to 425’F.
Shape the pizza dough into a circle between 14 and 16-inches in diameter and place on a large sheet of parchment paper. Spread a 1/2 cup of the chile mixture over the crust in an even layer. Top the pizza with the black beans, bell peppers and cheese. Arrange jalapeño slices on top of the cheese. Place in the oven and bake for about 10 minutes or until crust is golden and cheese bubbly and lightly browned.
Remove pizza from the oven and garnish with chopped cilantro and green onions. Slice and serve.
Notes
This recipe makes more sauce than you will need. That’s ok, because it freezes well or you can use to as a topping for your next batch of tacos or enchiladas.