A Spin on a Mexican Favorite: Chicken Posole

I don’t know how my love affair of Mexican food began. It sure wasn’t inspired by anything I ate while growing up. I’m from the Midwest, so that’s part of my excuse. But, really, when I was younger (dating myself here), the closest I could get to Mexican food was a certain fast food chain (hello, chalupa) and a certain fast-casual food chain (hola, unlimited chips and salsa!). It’s a wonder, then, how I came to love Mexican food so much. 

But I do love it and it has changed my life in the best, most positive way possible. How can a cuisine do that you ask? Simply, by educating me about food. I read so many great recipes featuring Mexican cooking and Mexican chefs, and I learned two important lessons. The first lesson I learned was the necessity of properly using spices to season food. The second lesson I learned was the importance of layering flavor, an indispensable tool used to build a recipe so that dishes go from ok to awesome. Those two lessons are the inspiration for how I make many of my dishes, including this Chicken Posole.

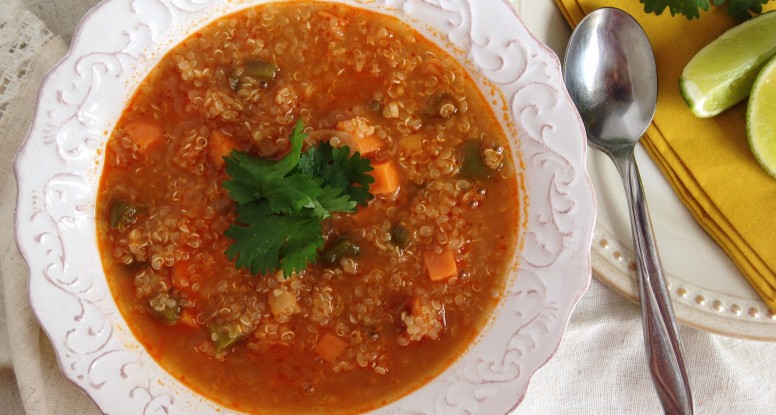
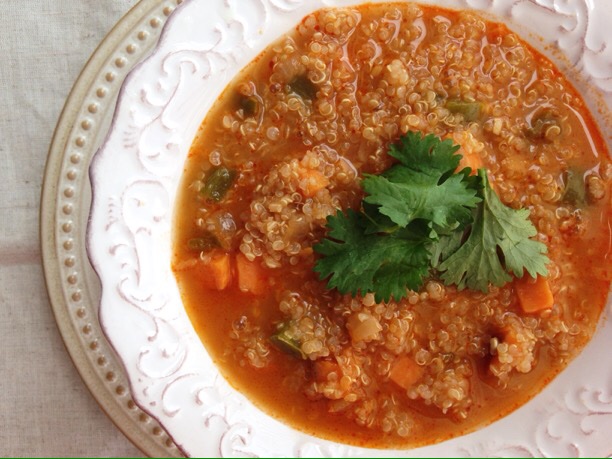
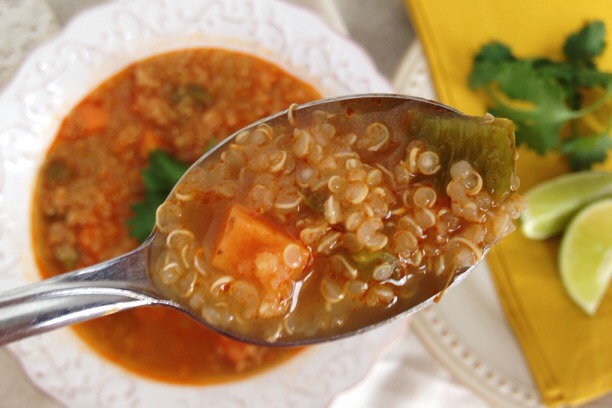
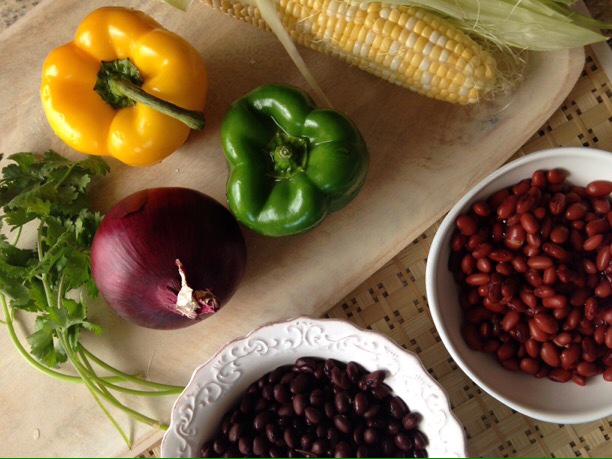
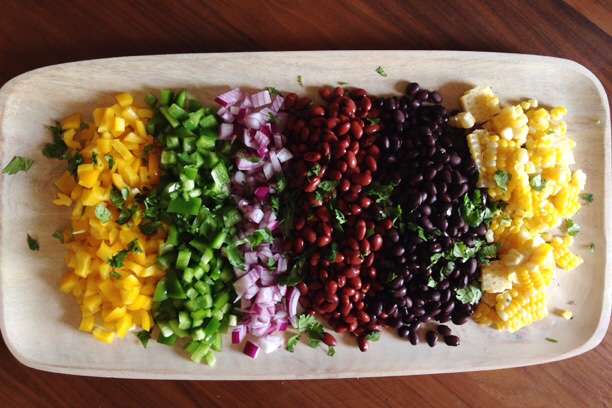
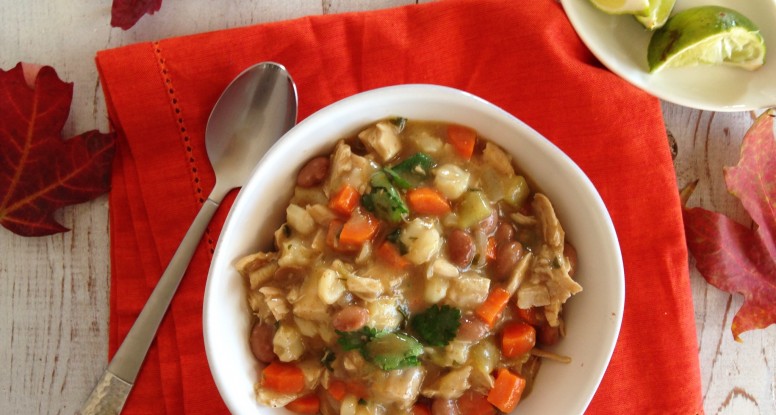
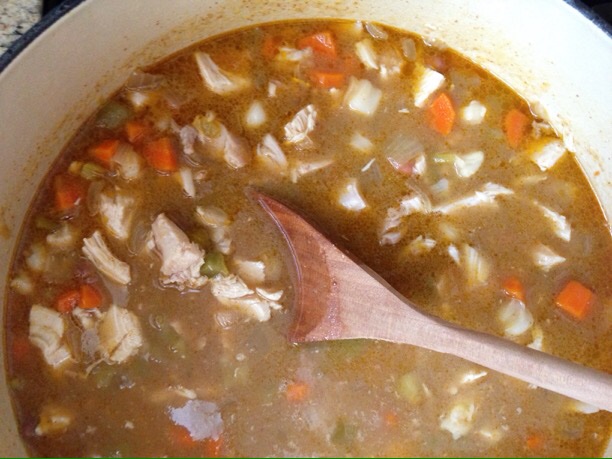
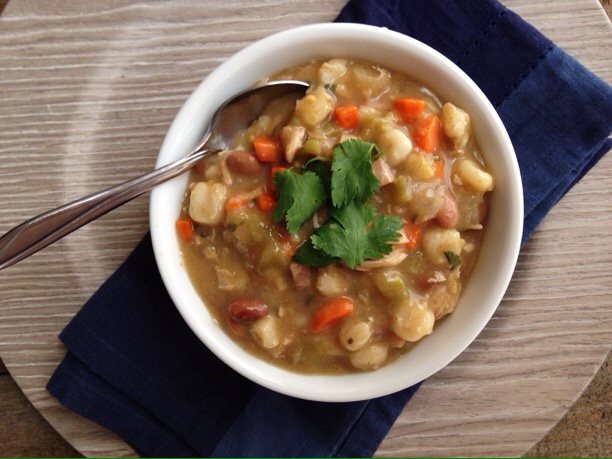
It’s not just another stew, it’s something that honors those lessons of properly using spices and building flavor. It’s brimming with everything from cumin to green chiles to the super delicious and texturally-pleasing hominy. This Chicken Posole is a tribute to honestly good food. It can fill any hungry or “hangry” belly and bring a smile to any face.


READ THIS PEOPLE!

Whew, did I get your attention? Good, that was on purpose. I want you to read this part because these are tips for success, including a few reasons why I did what I did with this recipe. Read on…

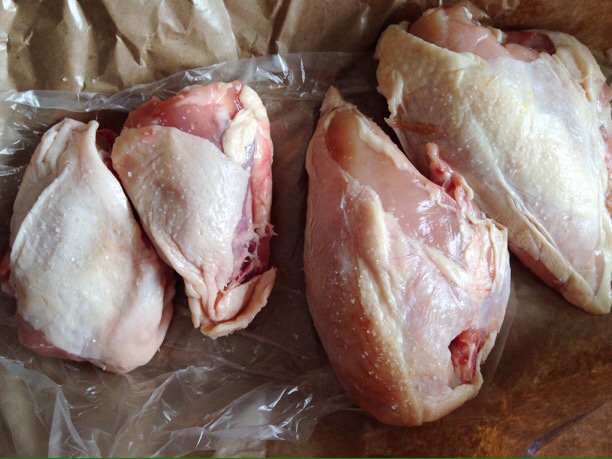
  • Buy the skin-on, bone-in chicken. Trust me! The skin helps add depth of flavor in two ways. First, when you sear it, you’ll get some yummy browned bits that stick to the pan, that’s called fond, and it’s good stuff. Second, you’ll cook the chicken with the skin-on, which will give your stew a really nice, enhanced chicken broth taste. (Don’t worry, you’ll take the skin off and bones off before you eat it!)
  • Back to that chicken, don’t even think about touching it or peeking at it while you’re searing it. You’ll just rip the skin right off and you’ll be mad and cry. I want you to be happy.
  • I add flour here, why? Because I want a stew that’s thick and by adding this flour and cooking it with the fat, I accomplish that. No whimpy stew broth for me!

And here, the montage of pictures honoring this Chicken Posole

IMG_0002


IMG_0003


IMG_0005


IMG_0006


IMG_0004


IMG_0008


Print
clock clock iconcutlery cutlery iconflag flag iconfolder folder iconinstagram instagram iconpinterest pinterest iconfacebook facebook iconprint print iconsquares squares iconheart heart iconheart solid heart solid icon

Chicken Posole


  • Author: Sara Haas

Description

A big pot of warmth, this stew is hearty and loaded with flavor. Perfect for tailgates or potlucks or a delicious family dinner.


Ingredients

Scale
  • 1 tablespoon vegeatable oil
  • 2 skin-on, bone-in chicken thighs (about 3/4 pound)
  • 2 skin-on, bone-in chicken breasts (about 1 1/4 pound)
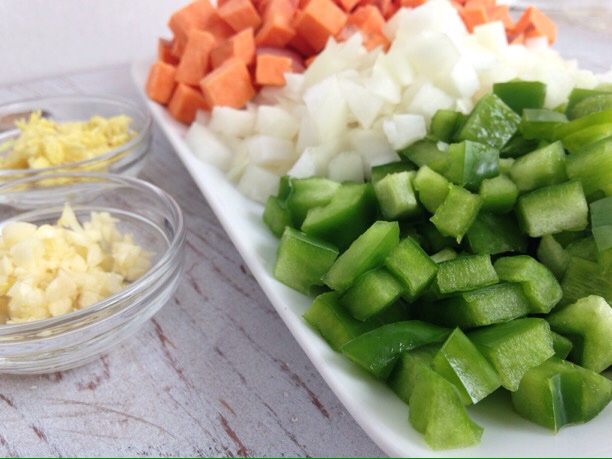
  • 1/2 medium onion, diced (about 1 1/3 cups)
  • 2 medium carrots, peeled and diced (about 1 cup)
  • 1 tablespoon chili powder
  • 1 teaspoon cumin
  • 1/4 cup all-purpose flour
  • 4 cups low-sodium chicken broth
  • 1 (15.5-ounce) can pinto beans, rinsed and drained
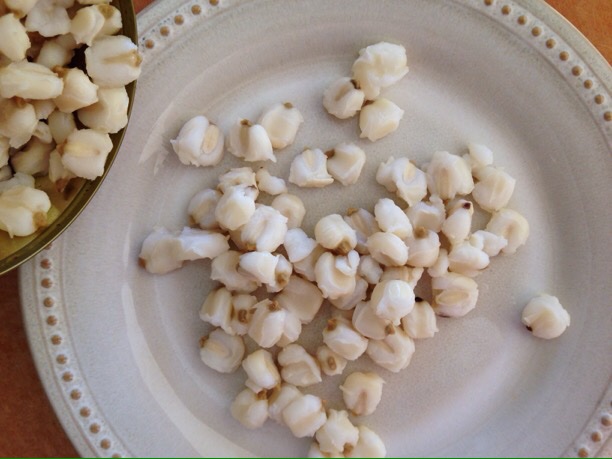
  • 1 (25-ounce) can hominy, drained
  • 1 (4-ounce) can diced green chiles
  • 1 lime, juiced
  • 1/2 cup fresh cilantro, chopped

Instructions

  1. Heat the oil in a pot or dutch oven over medium-high heat until shimmering. Season the chicken with salt then arrange, skin-side down in the pot. Cook about 6-7 minutes, until skin is golden brown. Move to a plate.
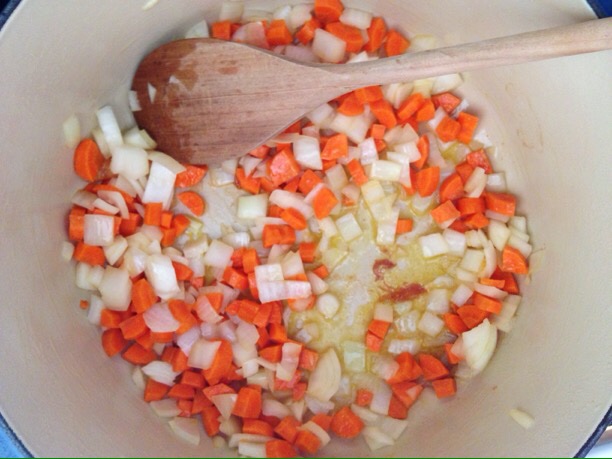
  2. Add the onion and carrots to the pot and cook until softened, about 6-7 minutes. Add the chili powder and cumin and cook, stirring occasionally, until fragrant, about 1 minute. Stir in the flour and cook and stir for 1 more minute. Add the chicken broth, stirring to scrape any bits off the bottom of the pan. Bring mixture to a simmer then add the chicken, pressing it into the liquid to fully submerge it. Reduce the heat to medium-low, simmer uncovered, until chicken is cooked (has reached an internal temperature of 165’F), about 25 minutes. Check occasionally during cooking to ensure that chicken is still submerged. Add water, 1/2 cup at a time to keep chicken in the cooking liquid.
  3. Remove the chicken to a cutting board and let it cool 5 minutes. (At this point you can also skim the surface of the soup to remove any scum or excess oil/fat.)
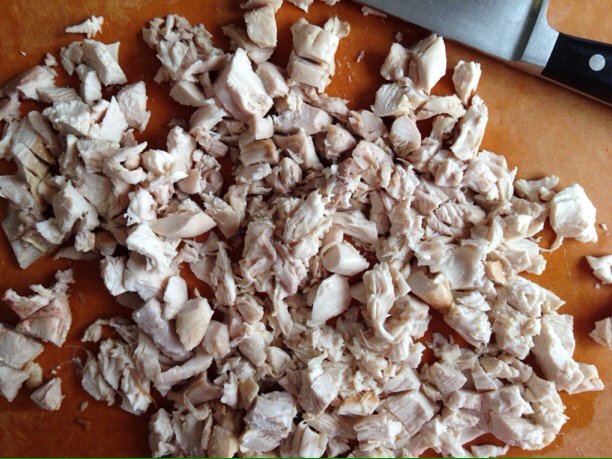
  4. Carefully remove and discard skin. Using a fork, remove the meat from the bones. Discard bones. Roughly chop the chicken and add it back to the pot along with the drained beans, hominy and chiles. Cook an additional 10 minutes.
  5. Stir in lime juice and cilantro and serve.

Notes

  • This recipe makes about 9 cups of stew, this allows for a generous 1 1/2 cup portion for 6 people.

Nutrition

  • Serving Size: 6
  • Calories: 346
  • Sugar: 2
  • Sodium: 557
  • Fat: 9
  • Saturated Fat: 2
  • Unsaturated Fat: 6
  • Trans Fat: 0
  • Carbohydrates: 38
  • Protein: 28
  • Cholesterol: 77

Cranberry Pumpkin Granola Bars

Here’s the deal, my family loves granola bars. I’m sure you can relate. I mean, is there really a more perfect snack? Well, of course there is, but this one is just so handy, which makes it the “perfect” snack in my eyes. Here’s the problem though, crappy granola bars are everywhere! Even worse, really good granola bars are expensive! Ugh!

What’s a mom, wife, daughter, friend to do? Why, make my own and share the recipe with YOU, my faithful followers! 🙂

Yes, I want you to have the option of making  your own bars because you know, just as much as I do, that granola bars rock. So take that money you were going to spend on the crappy or expensive bars and use it to buy the ingredients to make these perfect little Cranberry Pumpkin Granola Bars. 

Need more reasons to love these? Thought so!

  1. They freeze well. Yes they do! So make a double batch and keep some in the freezer so you’re never without. Just cut them before freezing them, then stuff them into a re-sealable freezer bag. Give them a little room and lay them flat in the freezer. Once partially frozen, you can rearrange them and they won’t stick.
  2. They taste good and your kids will eat them. This means no more fights about other junk they want to eat. They will like them and beg you for more. Which, in my world, is sooo much nicer than hearing them beg for pink cupcakes!
  3. Your kids (or hey, even someone else’s) can help you make these! Woo hoo! Who doesn’t need an extra set of hands in the kitchen? And listen, getting kids into the kitchen is one of the best things we can do as parents or care givers!
  4. They make great gifts. Oh indeed and what about hostess gifts? Yes, that too! I mean, wouldn’t you want these wrapped up and given to you? I’ll take them over a candle any day!

Enjoy, my friends!

And here are the pretty pictures:

Check out how I made these beautiful Cranberry Pumpkin Granola Bars!

IMG_0038

IMG_0039

IMG_0041

IMG_0042

IMG_0043

IMG_0044


IMG_0049


IMG_0047


IMG_0046

Print
clock clock iconcutlery cutlery iconflag flag iconfolder folder iconinstagram instagram iconpinterest pinterest iconfacebook facebook iconprint print iconsquares squares iconheart heart iconheart solid heart solid icon

Cranberry Pumpkin Granola Bars


  • Author: Sara Haas

Description

A Fall spin on the classic granola bar. This one is also gluten and nut free!


Ingredients

Scale
  • 1 1/2 cups old fashioned oats
  • 1/2 cup pumpkin seeds
  • 1/4 cup pecans, roughly chopped
  • 1 tablespoon butter
  • 1 tablespoon pumpkin pie spice
  • 1/4 cup pumpkin puree
  • 1/4 cup maple syrup
  • 1/4 teaspoon salt
  • 1/2 cup prunes, very finely chopped (or pulsed find in a food processor)
  • 1/2 cup dried cranberries, very finely chopped (or pulsed find in a food processor)

Instructions

  1. Preheat the oven to 300’F. Line a 9×9-inch pan with parchment paper. (Using two overlapping strips works well here for removing the bars from the pan after baking.)
  2. In a large bowl, combine the oats and pumpkin seeds.
  3. Heat a small pot or pan over medium heat and add the butter. Once the butter has melted, stir in the pumpkin pie spice and cook, stirring constantly, for 1 minute. Add the pumpkin puree and cook 1 more minute. Stir in the maple syrup, salt, prunes and cranberries. Remove from heat and pour over the oat mixture.
  4. Pour the oat mixture into the prepared pan and spread evenly across the bottom. Using a piece of foil, wax paper or parchment paper, cover the granola bars and push down evenly on the top to compress the mixture. The firmer the bar, the better it will hold together after it’s cooked. Remove foil, wax paper or parchment and place in the oven.
  5. Cook bars for 15 minutes. Remove pan from the oven and set on a rack to cool. Once cooled, transfer the pan to the refrigerator and chill at least 2 hours. Using the parchment paper, remove the bars from the pan and cut into individual bars. (Why chill them? This helps them firm up, which makes cutting them easier!)

Notes

  • Cut bars can be kept in the refrigerator about 5 days and up to 2 months in the freezer.
  • To keep this one GF, just be sure to use gluten-free oats.
  • Cut the pan 5×3 to get 15 bars

Nutrition

  • Serving Size: 15
  • Calories: 127
  • Sugar: 5
  • Sodium: 41
  • Fat: 4
  • Saturated Fat: 1
  • Unsaturated Fat: 2
  • Trans Fat: 0
  • Carbohydrates: 22
  • Protein: 3
  • Cholesterol: 2

Mango Matcha Smoothie

Why I made this recipe: Because I am smitten with smoothies and equally smitten with matcha tea. So why not combine the two? Oh, and because I was hungry and I had these things in my house. Just being honest.

Why I love this recipe: This mango matcha smoothie is one of those recipes that’s super simple to make, yet the ingredients make it feel sophisticated. Love it for that and also because it tastes great.  

How this recipe is healthy: Lots of reasons. First, portion size. It’s just one cup, which in my world, is the perfect size for a smoothie. Because let’s face it, take-out smoothies end up more like colossal milk shakes rather than nutritious, cups of joy. Second, it’s got matcha tea powder in it, a really interesting type of tea made out of whole tea leaves, which means you get loads of antioxidants, including those that may help prevent certain diseases like heart disease. Nothing wrong with that, right? Also, I like it because it’s not super sweet. This isn’t dessert, it’s a snack or a nice supplement to breakfast or lunch. Enjoy it as is or use it as the base for an amazing smoothie bowl. Yum!

And here are the pretty pictures:

IMG_0023


IMG_0024


IMG_0026


IMG_0027

Print
clock clock iconcutlery cutlery iconflag flag iconfolder folder iconinstagram instagram iconpinterest pinterest iconfacebook facebook iconprint print iconsquares squares iconheart heart iconheart solid heart solid icon

Mango Matcha Smoothie


  • Author: Sara Haas

Description

A lightly sweet smoothie made with low-fat Greek yogurt, mango and matcha, perfect for an afternoon snack or as a post or pre-workout snack.


Ingredients

Scale
  • 1/2 cup low-fat plain Greek yogurt
  • 1/4 cup low-fat milk
  • 1/2 cup frozen, chopped mango
  • 1 teaspoon green matcha tea powder
  • 1 teaspoon ground flax seed

Instructions

  1. Combine all ingredients in the bottom of a blender and puree until smooth.
  2. Pour and enjoy!

Notes

  • Not sweet enough for you? Add a 1/2 teaspoon of honey.

Nutrition

  • Serving Size: 1
  • Calories: 171
  • Sugar: 23
  • Sodium: 115
  • Fat: 4
  • Saturated Fat: 2
  • Unsaturated Fat: 2
  • Trans Fat: 0
  • Carbohydrates: 25
  • Protein: 10
  • Cholesterol: 10

Red Curry Quinoa Soup

Why I made this recipe: Because “soup season” has officially begun in my household and because I really enjoy a bold-flavored, hearty soup like this Red Curry Quinoa Soup.

Why I love this recipe: Well, for the reasons I made this soup and for a few more too. First, quinoa is one of my favorite grains, not only is it nutritious, but it cooks super fast. That means this soup comes together fast too! Why else, you ask? Because it’s totally satisfying. There’s nothing I dislike more than a weak, bland, watery soup. This one is none of those things! 

How this recipe is healthy: Oh, that quinoa! Not only does it cook fast, but it is so nutritious! A perfect source of vegetarian protein and loaded with fiber and iron, it’s a delightful alternative to rice and other grains. And how about that red curry paste! Never heard of it? Well, let me introduce you to your new kitchen staple. This stuff is simply magical. Typically used in Thai cooking, it adds serious depth of flavor to any dish you make, plus a little heat. All of that flavor doesn’t even come at a caloric cost either! The ingredients, usually chili peppers, garlic, galangal (or Thai ginger), shallot, spices and kaffir lime are foods that are loaded with antioxidants and other nutrients, that also happen to be amazingly flavorful. A true culinary and nutritional gem.  

And here are the pretty pictures:

IMG_0001

IMG_0002

IMG_0003

IMG_0008

IMG_0005

IMG_0009


Print
clock clock iconcutlery cutlery iconflag flag iconfolder folder iconinstagram instagram iconpinterest pinterest iconfacebook facebook iconprint print iconsquares squares iconheart heart iconheart solid heart solid icon

Red Curry Quinoa Soup


  • Author: Sara Haas

Description

A hearty soup made with earthy, robust red curry paste, fresh vegetables and quinoa.


Ingredients

Scale
  • 1 tablespoon olive oil
  • 1/2 yellow onion, diced (about 3/4 cup chopped)
  • 1 green bell pepper, seeded and diced
  • 1 medium sweet potato, diced (about 1 1/2 cups chopped)
  • 2 cloves garlic, chopped
  • 1 tablespoon red curry paste
  • 2 teaspoons peeled, chopped fresh ginger
  • 1 cup quinoa
  • 4 cups vegetable or chicken broth (or water)
  • 2 tablespoons lime juice
  • Sea or Kosher salt, to taste
  • 1/4 cup chopped fresh cilantro

Instructions

  1. Heat the oil in a pot set over medium-high heat. Add the onion, pepper and sweet potato and cook, stirring frequently, about 10 minutes.
  2. Add the garlic, curry paste and ginger and cook, stirring, for 1 minute. Add the quinoa and cook 1 minute more. Stir in the broth and bring to a boil. Reduce heat to a simmer and cook for about 20 minutes or until potatoes are tender and quinoa is cooked.
  3. Remove from heat and add the lime juice. Season with salt to taste and garnish with fresh cilantro before serving.

Notes

  • Cut the potatoes into half-inch cubes, this helps them to cook more quickly. And don’t worry if they’re not exactly a half-inch, just about that size is perfect! 🙂
  • Portion is a generous 1 cup.

Nutrition

  • Serving Size: 6
  • Calories: 164
  • Sugar: 2
  • Sodium: 637
  • Fat: 4
  • Saturated Fat: 1
  • Unsaturated Fat: 3
  • Trans Fat: 0
  • Carbohydrates: 26
  • Protein: 6
  • Cholesterol: 0

In A Rush? Try this Hummus Sandwich!

Why I made this recipe: Because I need things to be simple sometimes, yet I also want them to taste good and be relatively healthy. I mean, who doesn’t want that? Or, should I say, why wouldn’t we all want that!?

Why I love this recipe: It requires no cooking which means my kitchen (and all of those in it) stay cool. It’s quick and easy to put together, something your kids could definitely help you do. It’s loaded with flavor, especially if you use a delicious hummus that’s loaded with good things like veggies or garlic. I also love it because I utilized a simple restaurant trick of dressing the greens before putting them in this sandwich. Yum, it’s a step you shouldn’t skip!

How this recipe is healthy: It seems I am turning into a bit of a vegetarian these days. Or maybe I am just having a summer love affair with vegetables? I can’t help it, they are so good. So, this recipe is loaded with healthy, nutrient-rich vegetables and accented with a tiny bit of full-flavored feta cheese. The dressing on the greens is made from olive oil (yay to unsaturated fat!) and the hummus is a great spread that adds flavor without adding excessive calories and fat. Pile it all on some seriously delicious, whole-grain bread, and you’ve got yourself a winning dish that would make any dietitian (or mom) proud!

And here are the pretty pictures:

IMG_0007


IMG_0005


IMG_0004


IMG_0009


IMG_0003

Print
clock clock iconcutlery cutlery iconflag flag iconfolder folder iconinstagram instagram iconpinterest pinterest iconfacebook facebook iconprint print iconsquares squares iconheart heart iconheart solid heart solid icon

The Fast Veggie & Hummus Sandwich


  • Author: Sara Haas

Description

A simple sandwich loaded with fresh vegetables, hummus and feta cheese.


Ingredients

Scale
  • 1 teaspoon Dijon mustard
  • 2 tablespoons red wine vinegar
  • 1 clove garlic, minced or grated
  • Black pepper, to taste
  • 2 tablespoons olive oil
  • 2 cups baby spinach or arugula leaves
  • 8 slices whole wheat bread (use good, hearty bread for this)
  • 1 cup hummus (plain, roasted red pepper, garlic, whatever!)
  • 1/4 cup crumbled feta cheese
  • 1 cup thinly sliced cucumber
  • 1 cup sliced tomato

Instructions

  1. In the bottom of a mixing bowl, combine the mustard, vinegar and garlic. Whisk in the olive oil and season with black pepper. Add the spinach or arugula and toss to coat.
  2. If desired, lightly toast the bread slices. Lay out the bread slices on a clean surface and spread 1 tablespoon of hummus onto each slice. On half of the slices, add the feta, cucumber, spinach and tomatoes. Top with other bread slice and serve.

Nutrition

  • Serving Size: 4
  • Calories: 363
  • Sugar: 6
  • Sodium: 669
  • Fat: 17
  • Saturated Fat: 4
  • Unsaturated Fat: 12
  • Trans Fat: 0
  • Carbohydrates: 42
  • Protein: 13
  • Cholesterol: 8

Black Bean Salad with Honey Lime Vinaigrette

Well, it’s officially September and it’s blazing saddles here in Chicago. That means it’s time to be creative in the kitchen. Read, “how can I cook without cooking?” Luckily, Mother Nature is on our side during the warmer months, providing us with a wealth of fresh produce that requires very little preparation. How kind of Her! So, to keep the sweat at bay, I created this hearty bean salad that’s both refreshing and satisfying.

If you’ve got a can opener and a knife, you’re all set for this recipe. Just pop open a couple of cans of beans, then chop up some fresh veggies and you’ve pretty much got this dish made. Lots of beans and veggies means you know it’s good for you, which is just an added bonus, really. Then, to jazz it all up a bit, I’ve created a tangy, yet sweet vinaigrette made from fresh lime juice and zest as well as honey, mustard and olive oil. That’s it! So easy, just like I promised.

Serve up a big bowl of this tonight for dinner and save the rest to munch on during the week. This salad tastes even better after a day or two in the fridge.

P.S. – If you’re not in the mood to cook an ear of fresh corn, you can substitute thawed corn or canned corn. See, so easy!

IMG_0003


IMG_0001


IMG_0004


IMG_0005


IMG_0006

Print
clock clock iconcutlery cutlery iconflag flag iconfolder folder iconinstagram instagram iconpinterest pinterest iconfacebook facebook iconprint print iconsquares squares iconheart heart iconheart solid heart solid icon

Black Bean Salad with Honey-Lime Vinaigrette


  • Author: Sara Haas

Description

This delightfully healthy dish comes together fast and it not only looks beautiful, but tastes great too.


Ingredients

Scale

For the salad

  • 1 ear of fresh corn, shucked and cleaned (or about 1 cup corn kernels)
  • 1 can (15 ounce) black beans, rinsed and drained
  • 1 can (15 ounce) can kidney beans, rinsed and drained (or any other bean will work here too)
  • 1 red or yellow bell pepper, seeded, stemmed and diced
  • 1 green bell pepper, seeded, stemmed and diced
  • 1/2 medium red onion, peeled and diced
  • 1/2 cup fresh cilantro leaves, roughly chopped
  • 1/2 jalapeno, seeded and diced (optional)

For the dressing

  • 1 teaspoon dijon mustard
  • 1 lime, zested and juiced
  • 2 tablespoons honey
  • 1/3 cup olive oil
  • sea salt, to taste

Instructions

To prepare the salad

  1. Bring a pot of water to a boil. Add the corn and return to a boil. Cook for 5 minutes, then drain and rinse the corn under cold water to stop the cooking process. Pat dry and when cool enough to touch, cut kernels from the cob and add to a large serving or mixing bowl.
  2. To the same bowl with the corn, add the beans, peppers, onion, cilantro and jalapeño, if you’re using it. Toss to combine.

For the dressing

  1. In a small mixing bowl, combine the mustard, lime zest, lime juice and honey. Whisk in the olive oil.

To serve

  1. Pour the dressing over the salad and toss to evenly coat the beans and vegetables. Cover the bowl with a lid or plastic wrap and refrigerate for at least an hour. Toss again before serving.

Notes

  • This recipe makes between 7 1/2 and 8 cups salad.
  • You don’t have to let this salad sit in the fridge before digging in, but it does taste so much better when you do!

Nutrition

  • Serving Size: 8
  • Calories: 201
  • Sugar: 7
  • Sodium: 140
  • Fat: 10
  • Saturated Fat: 1
  • Unsaturated Fat: 8
  • Trans Fat: 0
  • Carbohydrates: 25
  • Protein: 6
  • Cholesterol: 0

Short and Sweet Series: Banana Mango Coconut Smoothie Recipe

Why I made this recipe: Because I love trying new smoothie recipes and mango is one of my favorite fruits.

Why I love this recipe: This one is super creamy, and the touch of coconut makes it feel indulgent and tropical, like you’re on vacation, laying on a beach, reading a good book, under the shade of a palm tree…you get the picture.

How this recipe is healthy: Oh, it’s healthy alright. If you read the ingredient list, you’ll know that this smoothie is jam-packed with good nutrients. It’s loaded with healthy fats from the avocado and flax seed and it’s bursting with powerful vitamins like A and C and important minerals like potassium. And don’t forget the calcium, it’s in there too, thanks to that healthy dose of low-fat milk.

And here are the pretty pictures:

IMG_0112


IMG_0113


IMG_0114


IMG_0111


Print
clock clock iconcutlery cutlery iconflag flag iconfolder folder iconinstagram instagram iconpinterest pinterest iconfacebook facebook iconprint print iconsquares squares iconheart heart iconheart solid heart solid icon

Banana Mango Coconut Smoothie


  • Author: Sara Haas

Ingredients

Scale
  • 1 small banana, peeled and sliced
  • 1 mango, peeled, seeded and cubed
  • 1 1/2 cups low-fat milk (or other non-dairy milk alternative)
  • 1/2 avocado, peeled, seeded and cubed
  • 1 tablespoon ground flax seed
  • 2 tablespoons grated or flaked dried coconut
  • 2 teaspoons honey

Instructions

  1. Spread the sliced banana and mango cubes evenly out onto a cookie sheet lined with parchment paper. Freeze for at least 1 hour and up to 2 hours. (If desired, this step can be done advance, just be sure to transfer partially frozen fruit to a re-sealable freezer bag to prevent it from sticking to the paper).
  2. Pour the milk into the bottom of a blender and add the frozen fruit, avocado, ground flax seed, coconut and honey. Puree until smooth. Pour into cups and serve immediately.

Notes

  • Makes 3 cups.
  • This smoothie isn’t mind-numbingly sweet. But if you’re looking for some additional sweetness, add a little more honey.

Nutrition

  • Serving Size: 4
  • Calories: 188
  • Sugar: 23
  • Sodium: 52
  • Fat: 7
  • Saturated Fat: 2
  • Unsaturated Fat: 4
  • Trans Fat: 0
  • Carbohydrates: 30
  • Protein: 5
  • Cholesterol: 5

Pe-anna-berry Smoothie

Some people don’t see over-ripe, bruised fruits as having any potential. Not me! I see them as an opportunity! Case in point, I had a peach (leftover from my last post) and a banana sitting on my counter looking quite sad, but still viable. Knowing I needed to act fast, I did a little brainstorming and heeded the warning from my growling stomach, and decided upon a smoothie.

Luckily for me, it was fit the bill for what I was craving. I love the subtle flavor of the peach and the sweetness of the blueberries and banana. Adding the flax seed was a way to get some healthy fats and additional fiber in. And spinach just seems like an easy thing to add and I always enjoy the thought of drinking my spinach. For some reason, I think that’s fun. Yes, I am a little quirky like that.

I have to say it was a hit at my house. I enjoyed mine and had even more fun watching my 2 1/2 year old enjoy hers. So next time you see fruit on your counter and you’re considering tossing it, I challenge you to use it instead. Most fruits make a great base for smoothies, and if you happen to have a peach and banana lying around, try my recipe for Pe-anna-berry Smoothie!

Iphone072315 022


Iphone072315 023


Iphone072315 024


Iphone072315 027

Print
clock clock iconcutlery cutlery iconflag flag iconfolder folder iconinstagram instagram iconpinterest pinterest iconfacebook facebook iconprint print iconsquares squares iconheart heart iconheart solid heart solid icon

Pe-anna-berry Smoothie


  • Author: Sara Haas

Description

A delightful way to start the day or finish a workout. Bursting with fruit, flax seed and even a little spinach. Why not make what you’re sipping a little more nutritious!


Ingredients

Scale
  • 1 cup almond milk (or any other milk, preferably low-fat)
  • 1 cup baby spinach
  • 1 tablespoon flax seed
  • 1 ripe peach, seeded and cut into chunks
  • 1 ripe banana, peeled and sliced
  • 1/2 cup frozen blueberries
  • 1/2 cup low-fat Greek yogurt
  • ¼ cup ice
  • 1 tablespoon honey (if desired)

Instructions

  1. Place the milk, spinach, flax, peach, banana and blueberries into a blender and pulse until combined. Add the yogurt and ice (and honey, if desired) and puree until smooth.
  2. Pour into a fun glass and enjoy! (Fun glass is of course optional)

Notes

  • Makes 3 cups.

Nutrition

  • Serving Size: 2
  • Calories: 219
  • Sugar: 30
  • Sodium: 59
  • Fat: 5
  • Saturated Fat: 1
  • Unsaturated Fat: 3
  • Trans Fat: 0
  • Carbohydrates: 41
  • Protein: 7
  • Cholesterol: 4

Recipe Redux: Lacinato Kale Salad with Peaches and Maple Vinaigrette

July is an amazing time of year in Chicago. The parks are bursting with activity, the pools are packed with every kid in the neighborhood and it seems like everyone is outside, enjoying every ray of sunshine. It’s a magical time of year here, and I love it. That energy always inspires me in the kitchen. I’ve long forgotten about those hearty winter dishes because my “palette” has been replaced with fresh, beautiful, summer produce.

That brings me to this month’s Recipe Redux theme, which is simply, use the beautiful produce that surrounds you to create a delicious dish. Challenge accepted! Seeing as I love a good salad, I turned my sights to one of my favorite greens, kale. Not just any kale though, dark green, dinosaur or lacinato kale. I love this type of kale, not just because it’s nutritious (that dark green color means it’s laden with good-for-you antioxidants!), but because it’s a bit sweeter and a little more tender than it’s conventional counterpart. It also makes a lovely salad when sliced into fun, thin little ribbons.

Kale is a good start, but then, what should I top it with? Well, of course more gorgeous produce! How about a bell pepper and oh, what about a delicious, ripe, juicy peach? And for a little crunch (and to get some healthy fats in there), how about some walnuts? Then, to keep things simple, a vinaigrette made with only five ingredients, all of which are kitchen staples. Success! (I forgot to mention the goat cheese, a definite necessity, don’t leave it out!)

Enjoy this lacinato kale salad with peaches and maple vinaigrette as a meal by topping it with grilled chicken or tofu. Or scoop it into bowls and serve it on the side with any summer meal. It can make a great appetizer too, a perfect starter that’s refreshing and just happens to be nutritious too!

Iphone072015 092

Iphone072015 100

Iphone072015 101

Iphone072015 103

Iphone072015 099

Iphone072015 104

Iphone072015 107

Iphone072015 108

Print

clock clock iconcutlery cutlery iconflag flag iconfolder folder iconinstagram instagram iconpinterest pinterest iconfacebook facebook iconprint print iconsquares squares iconheart heart iconheart solid heart solid icon

Lacinato Kale Salad with Peaches and Maple Vinaigrette


  • Author: Sara Haas

Ingredients

Scale

For the dressing

  • 1 teaspoon dijon mustard
  • 1 tablespoon maple syrup
  • 1 tablespoon apple cider vinegar
  • 1 teaspoon minced shallot
  • 2 tablespoons olive oil

For the salad

  • 1 bunch (about 12 ounces) lacinato kale, thoroughly washed
  • 1 ripe peach, pitted and thinly sliced
  • 3/4 cup walnuts, toasted
  • 1/2 shallot, thinly sliced
  • 1 red bell pepper, seeded, stemmed and thinly sliced
  • 1/4 cup crumbled goat cheese
  • Salt and black pepper, to taste

Instructions

  1. To make the dressing: In a small bowl, whisk together the mustard, maple syrup, apple cider vinegar and shallot. Continue to whisk while streaming in the olive oil, mixing until combined.
  2. To make the salad: Remove the stems from the kale and reserve for another use (slice and use in a soup, for example). Thinly slice the kale leaves and place them in a large mixing bowl. Give the kale leaves a good massage with your hands to help soften them. Add half of the dressing and toss to coat. Let sit for about 10 minutes then add the peach slices, walnuts, shallot, pepper, goat cheese, along with a pinch of salt and a few grinds of black pepper. Add the remaining dressing and carefully toss everything together. Serve immediately.

Notes

  • This recipe makes about 8 cups of salad.

Nutrition

  • Serving Size: 6
  • Calories: 195
  • Sugar: 5
  • Sodium: 78
  • Fat: 15
  • Saturated Fat: 3
  • Unsaturated Fat: 12
  • Trans Fat: 0
  • Carbohydrates: 13
  • Protein: 6
  • Cholesterol: 5


Green Bean and Corn Salad

Green Beans and Corn Salad


Summer!!! It’s finally here! I can, at last, look out my window and see leaves on the trees and grass on the ground. This makes me so incredibly happy! Besides the nicer, warmer weather, I’m also very excited about the plethora of amazing fresh produce practically spilling out of the bins at the supermarket and farmer’s markets. It’s like Christmas every day for me! To honor that excitement, one of my most recent posts on the Cutting Board Blog is for a Green Bean and Corn Salad. It’s a simple salad that highlights the beauty of summer produce. So enjoy and hey, why not bring it your July 4th party? It’s perfect for picnics and potlucks.

Click here for the link to the recipe.

Meal Plan like a Pro! Grab my NEW Meal Planning Workbook!

X